PyScripter: Python IDE for Efficient Coding

As a Python enthusiast, I’ve discovered a powerful and versatile Integrated Development Environment (IDE) that has revolutionized the way I approach coding. PyScripter is a game-changer when it comes to streamlining my Python scripting workflow and boosting my productivity. But what sets PyScripter apart from other Python IDEs, and why should you consider making it your go-to coding companion?

In this article, I’ll delve into the world of PyScripter, exploring its key features, benefits, and how it can transform your Python development experience. From seamless code editing to advanced debugging tools, PyScripter offers a comprehensive suite of features that cater to both beginners and seasoned developers alike. So, are you ready to unlock the full potential of your Python scripting with PyScripter?

Introducing PyScripter: The Versatile Python IDE

Embark on your Python coding journey with PyScripter, a comprehensive and feature-rich IDE (Integrated Development Environment) that revolutionizes the way you write, test, and deploy your applications. As a powerful Python IDE, PyScripter offers a seamless and efficient development experience, catering to both novice and seasoned programmers alike.

What is PyScripter?

PyScripter is a robust and user-friendly Python IDE that provides a wide range of tools and features to enhance your coding productivity. Designed with simplicity and efficiency in mind, PyScripter offers a clean and intuitive interface, making it easy to navigate and adapt to your coding workflow.

Key Features and Benefits

At the core of PyScripter’s capabilities are its comprehensive features, which include:

  • Syntax Highlighting: PyScripter’s syntax highlighting ensures that your code is easy to read and understand, with different language elements displayed in distinct colors for improved visual clarity.
  • Code Folding: Streamline your code editing process with PyScripter’s code folding feature, which allows you to collapse and expand code blocks for better organization and navigation.
  • Advanced Text Manipulation: Boost your productivity with PyScripter’s powerful text manipulation tools, such as multi-cursor editing, block selection, and column mode, enabling you to perform complex tasks with ease.
  • Integrated Debugging: PyScripter’s built-in debugging capabilities make it easy to identify and resolve issues in your code, with features like breakpoints, step-by-step execution, and variable inspection.

These key features, combined with PyScripter’s intuitive interface and seamless integration with the Python ecosystem, make it a valuable tool for Python development. Whether you’re a beginner exploring the world of Python or an experienced developer seeking to optimize your coding workflow, PyScripter is the versatile IDE that can elevate your Python programming experience.

Why Choose PyScripter for Python Development?

As a Python developer, I’ve explored various IDEs (Integrated Development Environments) to streamline my coding workflow. Recently, I discovered PyScripter, and I have to say, it’s been a game-changer for my productivity. Let me share with you why I believe PyScripter is an excellent choice for Python development.

Firstly, PyScripter boasts a range of pyscripter advantages that make it a standout among python development tools. Its intuitive and customizable user interface allows me to tailor the IDE to my specific needs, enhancing my coding productivity. The seamless integration with popular Python libraries and frameworks, such as Django and Flask, saves me valuable time and effort during IDE selection and project setup.

  • Comprehensive code editing features, including syntax highlighting, code folding, and code completion, help me write clean and efficient Python code with ease.
  • The built-in debugger and testing tools provide a robust environment for troubleshooting and ensuring the reliability of my applications.
  • PyScripter’s support for version control systems, such as Git, simplifies collaboration and project management, making it an ideal choice for team-based Python development.

One of the standout features of PyScripter is its flexibility. As a Python developer, I appreciate the ability to integrate various python development tools and customize the IDE to suit my preferences. Whether I’m working on a small personal project or a large-scale enterprise application, PyScripter has the versatility to adapt to my needs and enhance my overall coding productivity.

Feature Benefit
Intuitive User Interface Streamlined workflow and enhanced productivity
Seamless Library Integration Faster project setup and development
Robust Debugging and Testing Tools Reliable application development
Version Control Integration Collaborative coding and project management

In conclusion, PyScripter’s combination of features, flexibility, and overall user experience make it a compelling choice for Python developers like myself. If you’re looking to streamline your python development tools and boost your coding productivity, I highly recommend giving PyScripter a try.

Getting Started with PyScripter

Embarking on your Python development journey with PyScripter is an exciting step. Whether you’re a seasoned programmer or a beginner dipping your toes into the world of coding, this versatile IDE is designed to make your life easier. Let’s delve into the process of installing and setting up PyScripter, followed by a guided tour of its user interface.

Installation and Setup

Installing PyScripter is a breeze. Simply visit the official PyScripter website, download the installer appropriate for your operating system, and follow the on-screen instructions. The setup process is straightforward and user-friendly, ensuring a seamless pyscripter installation experience.

Once the installation is complete, you’ll be ready to launch PyScripter and begin your coding adventure. The setup guide provided by the PyScripter team will walk you through the initial configuration, helping you customize the IDE to suit your preferences and workflow.

Navigating the User Interface

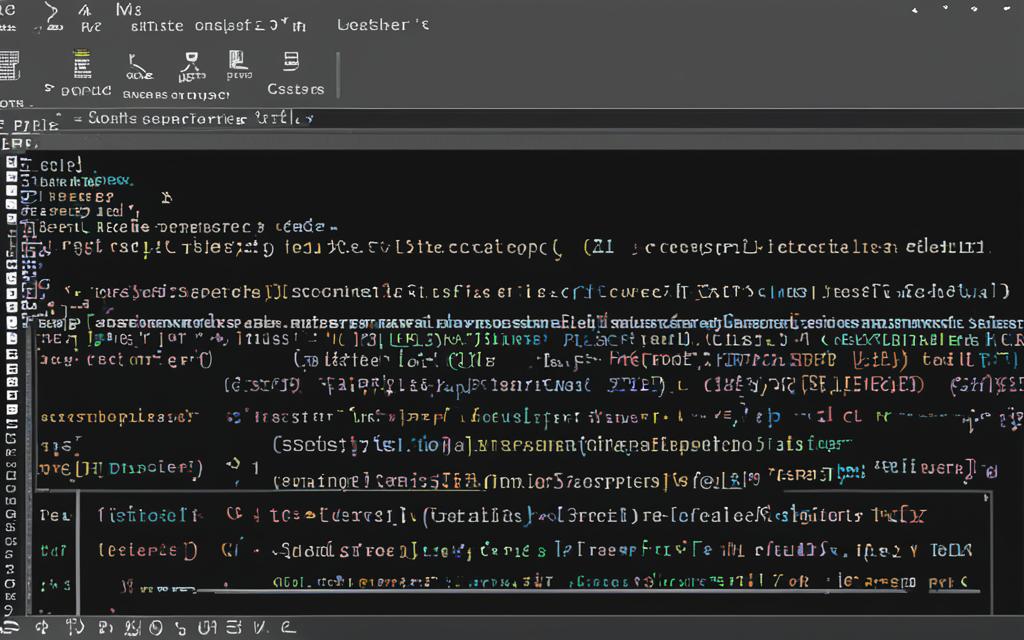
The PyScripter user interface is designed with efficiency and productivity in mind. Upon launching the IDE, you’ll be greeted by a clean and intuitive layout, with various panels and windows that cater to different aspects of your first-time setup. Let’s explore the key components that will help you navigate PyScripter with ease:

  • The code editor: This is the heart of PyScripter, where you’ll write and edit your Python scripts. Enjoy features like syntax highlighting, code folding, and auto-completion to streamline your coding experience.
  • The project explorer: Manage your Python projects, files, and folders with ease, keeping your workspace organized and accessible.
  • The output window: Monitor the execution of your code, view error messages, and access the interactive Python console for quick testing and debugging.

Familiarize yourself with the layout and functionalities of PyScripter’s user interface to unlock the full potential of this powerful Python IDE.
pyscripter user interface

Streamlining Your Coding Workflow

As a Python developer, the efficiency of your coding workflow is paramount. PyScripter, a robust Python IDE, offers a range of features that can streamline your coding process and boost your productivity. One of the standout capabilities of PyScripter is its exceptional code editing and syntax highlighting tools.

Code Editing and Syntax Highlighting

PyScripter’s advanced code editing functionalities empower you to manipulate your text with ease. From intelligent auto-completion to seamless bracket matching, PyScripter ensures a smooth and intuitive coding experience. Its syntax highlighting feature further enhances your productivity by visually differentiating various language elements, making it easier to identify and correct errors.

Whether you’re pyscripter code editing, refactoring your code, or exploring new text manipulation techniques, PyScripter’s versatile tools will become an indispensable part of your Python development workflow. With its customizable settings and user-friendly interface, you can tailor the IDE to your specific needs, optimizing your productivity and elevating your coding efficiency to new heights.

From seamless syntax highlighting to advanced text manipulation capabilities, PyScripter empowers you to write, manage, and refine your Python code with unparalleled ease and precision. Discover how this powerful IDE can streamline your coding workflow and unlock your full potential as a Python developer.

Debugging and Testing with PyScripter

As a seasoned Python developer, I know firsthand the importance of debugging and testing in the development process. That’s why I’m excited to share how PyScripter, the versatile Python IDE, can streamline these crucial tasks and help you write bulletproof code.

PyScripter’s built-in debugger is a game-changer, providing a seamless experience for identifying and resolving issues in your Python scripts. With its intuitive step-by-step execution, you can easily navigate through your code, set breakpoints, and inspect variable values to pinpoint the root cause of any problem. The debugger’s user-friendly interface makes it a breeze to debug your pyscripter projects, whether you’re a seasoned pro or a Python novice.

But PyScripter doesn’t stop there. It also offers robust testing capabilities, allowing you to create and run unit tests with ease. This is particularly helpful for ensuring your pyscripter code is reliable and bug-free, as you can quickly identify and address any regressions or unexpected behavior. PyScripter’s tight integration with popular testing frameworks, such as unittest and pytest, simplifies the testing process and helps you build confidence in your pyscripter debugging and troubleshooting skills.

For those tricky error handling scenarios, PyScripter provides valuable tools to help you uncover and address them. The IDE’s comprehensive error logging and exception handling features allow you to quickly identify and diagnose issues, empowering you to write more resilient and maintainable Python applications.

Whether you’re a seasoned Python developer or just starting your journey, PyScripter’s debugging and testing capabilities are sure to streamline your workflow and help you deliver high-quality, reliable pyscripter code. So why not give it a try and experience the power of efficient pyscripter debugging and testing today?

Integrating PyScripter with Popular Python Libraries

As a Python enthusiast, I’ve always been fascinated by the versatility and power of the language. One of the key aspects of my coding journey has been the seamless integration of PyScripter, my preferred Python IDE, with a wide range of popular Python libraries and external tools. This integration has truly elevated my development experience, allowing me to leverage the best of both worlds – the robust features of PyScripter and the expansive capabilities of the Python ecosystem.

PyScripter’s flexibility is truly remarkable. It seamlessly integrates with a vast array of pyscripter integration, from data analysis powerhouses like NumPy and Pandas to machine learning frameworks such as TensorFlow and scikit-learn. With just a few clicks, I can load these python libraries directly into my PyScripter workspace, enabling me to access their advanced functionalities and streamline my development workflow.

But the integration capabilities of PyScripter extend beyond just Python libraries. The IDE also effortlessly connects with a variety of external tools and plugins, further expanding its versatility. I can easily integrate PyScripter with version control systems like Git, collaborate with teammates through code sharing platforms, and even leverage powerful debugging and testing tools – all within the familiar PyScripter environment.

One of the aspects I appreciate the most about PyScripter’s integrations is the ease of use. The intuitive user interface and well-designed workflows make it a breeze to incorporate these external resources into my projects. I no longer have to juggle between multiple applications or struggle with complex configurations – PyScripter seamlessly handles the integration, allowing me to focus on the core task at hand: writing efficient and effective Python code.

pyscripter integration

In the ever-evolving world of Python development, the ability to seamlessly integrate PyScripter with the tools and libraries I rely on has been a game-changer. It has not only streamlined my coding processes but also unlocked new possibilities for exploring and leveraging the vast Python ecosystem. With PyScripter, I can truly unlock the full potential of my Python projects, empowering me to create innovative solutions with confidence and efficiency.

Unlocking Efficient Python Scripting with PyScripter

As a seasoned Python developer, I’ve always been on the lookout for tools that can streamline my workflow and boost my productivity. That’s why I’m particularly excited to share how PyScripter, the versatile Python IDE, can unlock new levels of efficiency when it comes to pyscripter scripting and automation.

One of the standout features of PyScripter is its robust scripting capabilities. With PyScripter, I can easily create and run custom Python scripts to automate repetitive tasks, streamline my development process, and free up valuable time for more strategic work. Whether it’s generating boilerplate code, automating file management, or integrating with external systems, PyScripter puts the power of automation at my fingertips.

What I love most about PyScripter’s scripting capabilities is the seamless integration with the IDE. I can write, test, and execute my pyscripter scripting all from within the same familiar interface, eliminating the need to switch between multiple tools. This level of productivity and efficiency is a game-changer for me, allowing me to focus on the core of my work rather than getting bogged down by tedious, manual tasks.

To further optimize my pyscripter scripting workflow, PyScripter offers a range of advanced features, such as code folding, syntax highlighting, and code completion. These tools help me write cleaner, more organized code, reducing the risk of errors and making it easier to maintain and iterate on my scripts over time.

Overall, PyScripter has become an indispensable part of my Python development toolkit. By unlocking the power of pyscripter scripting and automation, I’m able to streamline my workflow, boost my productivity, and deliver higher-quality results for my projects. If you’re a Python developer looking to take your scripting game to the next level, I highly recommend giving PyScripter a try.

Customizing PyScripter to Suit Your Needs

As a Python developer, I appreciate the ability to personalize my coding environment to align with my unique preferences and workflow. PyScripter offers an impressive array of customization options, allowing me to craft a development experience that truly feels like my own.

Configuring Settings and Preferences

Delving into PyScripter’s comprehensive settings and preferences menu, I can fine-tune everything from my code editor’s appearance to the behavior of various tools and features. With just a few clicks, I can adjust font sizes, color schemes, and keyboard shortcuts to match my personal style. This level of pyscripter customization ensures I can maintain optimal efficiency and focus while coding.

Installing and Managing Plugins

One of the key advantages of PyScripter is its robust plugin ecosystem. By installing carefully selected plugins, I can enhance the IDE’s functionality and unlock new capabilities tailored to my specific needs. Whether I’m seeking improved code editing tools, advanced debugging features, or seamless integration with my favorite Python libraries, PyScripter’s plugin system empowers me to sculpt a development environment that truly suits my preferences.

Plugin Description Benefits
PyLint Static code analysis tool Identifies code style issues and potential bugs
Jupyter Notebook Interactive computing environment Enables live coding, visualization, and collaboration
Git Integration Version control system integration Streamlines code management and collaboration

By embracing the depth of pyscripter customization options, I can create a tailored development environment that boosts my productivity, reduces cognitive load, and aligns seamlessly with my personal preferences and coding style. PyScripter’s commitment to empowering developers like myself is truly a game-changer in the world of Python IDEs.

Exploring PyScripter’s Advanced Features

As a seasoned Python developer, I’ve come to appreciate the power and flexibility of PyScripter, a versatile Integrated Development Environment (IDE) that goes beyond the basics of coding and debugging. In this section, let’s dive into the advanced features of PyScripter that can significantly boost your productivity and streamline your Python development workflow.

One of the standout advanced capabilities of PyScripter is its robust code refactoring tools. With PyScripter, you can easily restructure your code, rename variables, and even perform complex refactoring operations with a few simple clicks. This can be a game-changer for maintaining clean and organized Python projects, ultimately enhancing the pyscripter advanced features, productivity tools, and overall IDE capabilities.

Another impressive feature of PyScripter is its integrated project management capabilities. You can seamlessly manage your Python projects, organize your files and directories, and even track changes using the built-in version control system. This streamlined approach to project management can greatly improve your workflow and ensure your codebase remains well-structured and easy to navigate.

PyScripter also offers a range of debugging and testing tools that can help you identify and resolve issues in your Python code more efficiently. From advanced breakpoint management to comprehensive debugging logs, PyScripter provides a robust set of features to help you quickly pinpoint and fix bugs, further enhancing your overall pyscripter advanced features and IDE capabilities.

In addition to these powerful features, PyScripter also boasts a rich ecosystem of plugins and extensions that can be easily installed and configured to suit your specific needs. Whether you’re looking to integrate with popular Python libraries, automate repetitive tasks, or extend the functionality of your IDE, PyScripter’s plugin system provides a wealth of opportunities to customize your development environment and maximize your productivity tools.

As you can see, PyScripter is much more than just a basic Python IDE. By exploring its advanced features, you can unlock a world of possibilities and streamline your Python development workflow like never before. So, if you’re ready to take your Python skills to the next level, I highly recommend delving into the rich capabilities of PyScripter.

PyScripter for Beginners: A Gentle Learning Curve

If you’re new to the world of Python programming, PyScripter can be your gateway to a seamless and rewarding coding experience. This powerful Python IDE (Integrated Development Environment) offers a user-friendly interface and a wealth of learning resources, making it an ideal choice for beginners.

Resources for Learning Python with PyScripter

One of the standout features of PyScripter is its comprehensive documentation and tutorials. Whether you’re just starting to learn Python or looking to enhance your skills, PyScripter provides a wide range of learning resources to guide you through the process.

  • Detailed Python tutorials cover everything from basic syntax to advanced concepts, ensuring you have a solid foundation in the language.
  • The PyScripter user guide offers in-depth explanations of the IDE’s features, empowering you to leverage its full capabilities effectively.
  • Interactive code samples and exercises allow you to practice and reinforce your pyscripter for beginners knowledge.
  • Online forums and community support provide a valuable resource for troubleshooting and connecting with other Python enthusiasts.

With PyScripter, you’ll find that the learning curve is gentle and approachable, even for those with no prior experience in Python programming. The intuitive interface and comprehensive learning materials make it easy to get up and running quickly, allowing you to focus on honing your skills and creating impressive Python projects.

Whether you’re a student, a hobbyist, or a professional looking to expand your Python expertise, PyScripter offers a welcoming and supportive environment to embark on your pyscripter for beginners journey. Unlock the full potential of Python with the help of this versatile IDE and its wealth of learning resources.

Collaborative Coding with PyScripter

In today’s fast-paced software development landscape, collaboration is essential. As a Python developer, I’ve come to appreciate the power of working together with my team to create robust and innovative applications. This is where PyScripter, the versatile Python IDE, truly shines – it offers a suite of features designed to facilitate seamless pyscripter collaboration, team coding, and efficient project management.

One of the standout capabilities of PyScripter is its seamless integration with popular version control systems, such as Git. This allows my team and I to easily share our code, track changes, and manage project workflows, ensuring that everyone is always working with the latest version of the codebase. Whether we’re working in the office or remotely, PyScripter’s remote development features make it a breeze to collaborate on Python projects from anywhere in the world.

But PyScripter’s collaborative features go beyond just version control. The IDE also offers robust code-sharing capabilities, enabling my team to review each other’s work, provide feedback, and even co-edit scripts in real-time. This not only enhances our productivity but also fosters a culture of continuous learning and improvement within our development team.

Feature Description
Version Control Integration Seamless integration with popular version control systems like Git, allowing for efficient code sharing, tracking, and project management.
Remote Development Enables team members to collaborate on Python projects from anywhere, facilitating remote work and distributed development.
Real-time Code Sharing Allows team members to review, provide feedback, and co-edit scripts in real-time, fostering a collaborative coding environment.

As a professional Python developer, I’ve found PyScripter to be an invaluable tool for pyscripter collaboration and team coding. Its robust set of features, combined with its intuitive user interface, have helped my team work more efficiently and effectively, ultimately delivering higher-quality Python applications to our clients.

PyScripter in the Professional Python Ecosystem

As a professional Python developer, I’ve come to rely on PyScripter as an essential tool in my workflow. This versatile IDE has not only streamlined my individual coding projects but has also found its place within the enterprise-level Python development ecosystem. PyScripter’s robust features and seamless integrations make it a valuable asset for teams tackling pyscripter in professional Python and enterprise-level Python development challenges.

One of the key strengths of PyScripter is its ability to seamlessly integrate with a wide range of popular Python libraries and frameworks. Whether you’re working on data analysis, web development, or industry use cases, PyScripter’s intuitive interface and powerful functionality make it an ideal choice for integrations that drive efficiency and productivity.

PyScripter Features Benefits for Professional Python Development
Debugger Simplifies the debugging process, allowing teams to quickly identify and fix issues in complex, enterprise-level Python applications.
Version Control Seamless integration with popular version control systems, enabling effective collaboration and code management for professional Python projects.
Automated Testing Streamlines the testing process, ensuring the reliability and quality of enterprise-level Python applications.

The versatility of PyScripter has made it a valuable tool for professional Python developers across various industry use cases. From financial institutions to tech startups, PyScripter’s user-friendly interface and robust features have helped organizations tackle complex Python development challenges with ease.

As the Python ecosystem continues to evolve, I’m confident that PyScripter will remain a trusted companion for professional developers like myself, driving efficiency, collaboration, and success in enterprise-level Python development projects.

Comparing PyScripter with Other Python IDEs

In the ever-evolving world of Python development, the choice of an Integrated Development Environment (IDE) can significantly impact your coding efficiency and productivity. As a Python enthusiast, I’ve had the opportunity to explore various IDEs, and today, I’ll share my insights on how PyScripter compares to some of the leading alternatives in the market.

One of the primary considerations when selecting a Python IDE is the range of features it offers. PyScripter, with its intuitive interface and comprehensive toolset, stands out among its competitors. It provides a seamless coding experience, featuring robust syntax highlighting, code completion, and on-the-fly error checking – all of which are essential for streamlining your development workflow.

When comparing PyScripter to popular IDEs like PyCharm and Visual Studio Code, the former shines in its user-friendliness and ease of use. PyScripter’s clean and uncluttered layout makes it an attractive choice for beginners and experienced developers alike, as it helps to minimize distractions and keeps the focus on the task at hand.

Feature PyScripter PyCharm Visual Studio Code
Syntax Highlighting
Code Completion
Debugging Tools
Integrated Terminal
Virtual Environment Support
Version Control Integration
Customization Options

While PyCharm and Visual Studio Code offer a broader range of features and capabilities, PyScripter excels in its lightweight and focused approach, making it an excellent choice for developers who prefer a distraction-free coding environment. Additionally, PyScripter’s seamless integration with popular Python libraries and tools further enhances its appeal among the Python community.

Ultimately, the choice of a Python IDE is a personal one, and it often comes down to individual preferences and the specific needs of your project. By understanding the strengths and weaknesses of PyScripter in comparison to other leading IDEs, you can make an informed decision that aligns with your coding style and project requirements.
pyscripter vs other IDEs

The PyScripter Community: Support and Resources

As a Python developer, I’ve always believed that the strength of a development tool is often reflected in the vibrant community that surrounds it. PyScripter, the versatile Python IDE, is no exception. The PyScripter community is a thriving ecosystem of passionate users, dedicated contributors, and knowledgeable experts who come together to support, collaborate, and continuously improve this powerful software.

At the heart of the PyScripter community lies a network of support forums where users can seek assistance, share their experiences, and find solutions to their coding challenges. Whether you’re a newcomer to Python or an experienced developer, these forums are a valuable resource, providing a platform for exchanging ideas, troubleshooting issues, and accessing the collective knowledge of the community.

Alongside the support forums, the PyScripter community also offers comprehensive documentation that covers everything from installation and setup to advanced features and customization options. This extensive knowledge base is meticulously curated, ensuring that users of all skill levels can easily navigate and find the information they need to maximize their productivity with PyScripter.

But the community’s contributions don’t stop there. Developers within the pyscripter community are actively involved in providing user feedback, which is essential for the continuous improvement and evolution of the software. By sharing their insights, feature requests, and bug reports, these users play a crucial role in shaping the future of PyScripter, ensuring that it remains a cutting-edge tool that meets the evolving needs of the Python development ecosystem.

Whether you’re seeking support, exploring new features, or wanting to contribute to the growth of PyScripter, the vibrant and engaged pyscripter community is always there to lend a helping hand. By tapping into this valuable resource, you can unlock the full potential of PyScripter and elevate your Python coding experience to new heights.

Conclusion

As we’ve explored throughout this article, PyScripter is a remarkable Python IDE that can truly transform your coding workflow. Its powerful features, seamless integration, and robust community support make it an exceptional choice for Python developers of all skill levels.

Pyscripter’s intuitive user interface, advanced debugging tools, and streamlined scripting capabilities are just a few of the key benefits that set it apart. By leveraging Pyscripter, I’ve been able to write cleaner, more efficient code, and tackle complex projects with greater ease and productivity.

Whether you’re a seasoned Python programmer or just starting your journey, I wholeheartedly recommend Pyscripter as your go-to IDE. Its friendly learning curve and comprehensive learning resources make it an ideal companion for growing your Python skills. And with the unwavering support of the Pyscripter community, you’ll always have the guidance and resources you need to become a more proficient Python developer.

FAQ

What is PyScripter?

PyScripter is a powerful and versatile Python Integrated Development Environment (IDE) that helps developers streamline their coding workflow and boost productivity. It provides a range of features to simplify and enhance the Python development process.

What are the key features and benefits of PyScripter?

PyScripter offers a wide range of features, including syntax highlighting, code folding, advanced text manipulation tools, and a user-friendly interface. These capabilities help to streamline the coding process, increase efficiency, and boost productivity for Python developers.

Why should I choose PyScripter for my Python development?

PyScripter’s features and functionalities can greatly enhance your Python development workflow. It provides a tailored coding experience, streamlines various tasks, and boosts your overall productivity as a Python programmer.

How do I get started with PyScripter?

To get started with PyScripter, you’ll need to download and install the IDE on your system. The setup process is straightforward, and PyScripter’s user interface is designed to be intuitive and easy to navigate, allowing you to quickly familiarize yourself with the tool.

How does PyScripter help streamline my coding workflow?

PyScripter’s code editing and syntax highlighting features are key to streamlining your coding workflow. The IDE offers various text manipulation tools and customization options that enable you to write and manage your code more effectively, boosting your overall productivity.

What debugging and testing capabilities does PyScripter provide?

PyScripter’s robust debugging tools, including its built-in debugger, step-by-step execution, and breakpoint management, help you identify and resolve issues in your Python code. It also facilitates testing and error handling, ensuring your applications are reliable and bug-free.

Can I integrate PyScripter with popular Python libraries and external tools?

Yes, PyScripter’s flexibility allows you to seamlessly integrate it with a wide range of popular Python libraries and third-party applications, further enhancing your coding experience and workflow.

How can I use PyScripter for efficient Python scripting?

PyScripter excels at enabling efficient Python scripting. You can use it to automate repetitive tasks, streamline your workflow, and unlock new levels of productivity in your Python development projects.

How can I customize PyScripter to suit my needs?

PyScripter offers a high degree of customization, allowing you to tailor the IDE to your personal preferences and coding style. You can configure various settings and preferences, as well as install and manage third-party plugins to enhance the functionality of PyScripter.

What advanced features does PyScripter offer?

In addition to its core editing and debugging capabilities, PyScripter provides a range of advanced features that can significantly boost your productivity and efficiency, such as code refactoring, project management, and integrated version control.

How user-friendly is PyScripter for beginners?

PyScripter is known for its gentle learning curve, making it an excellent choice for Python beginners. The IDE’s user-friendly interface and comprehensive documentation help newcomers quickly get up to speed and start coding effectively, with a variety of learning resources available to guide them.

How does PyScripter support collaborative coding?

PyScripter offers features to facilitate seamless team-based coding, including support for version control systems, remote development, and code sharing, enabling you to work effectively with your peers on Python projects.

How is PyScripter utilized in the professional Python ecosystem?

PyScripter has found its place within the professional Python ecosystem, integrating with enterprise-level Python development workflows and proving valuable in various industry applications. It offers versatility and suitability for a wide range of professional Python development use cases.

How does PyScripter compare to other Python IDEs?

When comparing PyScripter to other popular Python IDEs, such as PyCharm, Visual Studio Code, and Spyder, it offers a unique set of features, strengths, and user preferences. Evaluating the key capabilities of each IDE can help you determine the best fit for your Python development needs.

What kind of community support and resources are available for PyScripter?

The PyScripter community is vibrant and supportive, offering various channels for problem-solving, documentation, and user feedback. The community fosters collaboration and continuous improvement, making it a valuable asset for both new and experienced Python developers.

Thonny: The Beginner-Friendly Python IDE

Are you eager to embark on your Python programming journey, but daunted by the complex tools and intricate setup required by traditional IDEs? Look no further than Thonny – a powerfully simple Python environment designed to make coding accessible and enjoyable for beginners. In this article, I’ll unveil the features that set Thonny apart and demonstrate how it can streamline your path to becoming a proficient Python programmer.

Thonny’s intuitive interface and step-by-step debugging capabilities are just the tip of the iceberg. As we delve deeper, you’ll discover how this remarkable tool can transform your Python learning experience, empowering you to write, run, and troubleshoot your code with ease. So, are you ready to embrace the joy of coding with Thonny? Let’s dive in and uncover the secrets that make this IDE a game-changer for aspiring programmers.

Introducing Thonny: A User-Friendly Python Environment

As a beginner programmer, I was thrilled to discover Thonny, a Python integrated development environment (IDE) that has quickly become my go-to tool for exploring the world of coding. Developed by the University of Tartu in Estonia, Thonny is a cross-platform application that runs seamlessly on Windows, macOS, and Linux, making it accessible to a wide range of users.

What sets Thonny apart is its intuitive and visually appealing interface, which is designed with the needs of beginner programmers in mind. The visual programming interface allows me to step through my code line by line, making it easier to understand the flow of execution and debug any issues that may arise.

One of the standout features of Thonny is its simplicity. As an educational coding tool, Thonny strips away the complexities often found in traditional IDEs, providing a focused and distraction-free environment for me to learn and practice Python programming. The clean and clutter-free layout makes it easy to navigate, and the built-in tools, such as the variable explorer and the code editor, are well-integrated and easy to use.

Whether I’m a complete beginner or an experienced programmer looking to sharpen my skills, Thonny’s beginner programming environment caters to my needs. The step-by-step debugging feature, in particular, has been a game-changer, allowing me to understand how my code is executing and catch any errors or unexpected behavior with ease.

I’ve been thoroughly impressed with Thonny and highly recommend it to anyone looking to dive into the world of Python programming. Its user-friendly interface, educational focus, and powerful debugging tools make it an invaluable resource for thonny enthusiasts of all skill levels.

Why Thonny Stands Out for Beginners

As a beginner programmer, finding an intuitive and user-friendly programming environment can make all the difference in your learning journey. This is where Thonny, a powerful yet accessible beginner programming environment, truly shines. Its simple and clean interface sets it apart from other IDEs, making it an excellent choice for those new to coding.

Simple and Clean Interface

One of the key advantages of Thonny is its visual programming interface. The IDE features a clutter-free layout, with only the essential tools and features displayed. This minimalist design helps new users focus on the task at hand, without feeling overwhelmed by a plethora of options. The interface is intuitive, allowing beginners to quickly navigate and understand the various components of the IDE.

Step-by-Step Debugging

Another standout feature of Thonny is its step-by-step debugger. This powerful tool enables users to carefully observe the execution of their code, line by line. This is particularly valuable for beginners, as it allows them to identify and troubleshoot issues in their programs with ease. The code visualization feature further enhances the debugging process, providing a clear and concise representation of the code’s execution.

By combining a user-friendly interface and robust debugging capabilities, Thonny creates an environment that fosters learning and exploration for aspiring programmers. Its focus on simplicity and guided assistance makes it an excellent choice for those embarking on their thonny journey.

Getting Started with Thonny

Setting up the Thonny, a cross-platform Python editor, is a breeze. Whether you’re using Windows, macOS, or Linux, the installation process is straightforward and can be completed in just a few simple steps.

Installation and Setup

To get started with Thonny, head over to the official Thonny website and download the latest version. The website offers installers for all major operating systems, making the installation process a seamless experience.

Once you’ve downloaded the installer, simply follow the on-screen instructions to complete the installation. Depending on your operating system, the process may vary slightly, but it’s generally a matter of a few clicks to have Thonny up and running on your machine.

After the installation is complete, you can launch Thonny and start exploring its user-friendly interface. The IDE is designed with beginners in mind, offering a clean and intuitive layout that makes it easy to get started with Python programming.

With Thonny, you can quickly write, execute, and debug your Python code, all within a single, cohesive environment. The IDE’s step-by-step debugging features and comprehensive documentation make it an excellent choice for learning and honing your Python skills.

So, whether you’re a complete beginner or an experienced Python developer, Thonny is a great IDE to have in your toolbox. Get started today and unlock the power of Python programming with this cross-platform editor.

Exploring Thonny’s Key Features

As an interactive code editor and visual programming interface, Thonny offers a range of features that make it an attractive choice for beginner programmers. With its intuitive design and powerful tools, Thonny simplifies the process of writing, testing, and debugging Python scripts, empowering users to dive into the world of coding with confidence.

One of Thonny’s standout features is its code visualization capability. The IDE provides a step-by-step representation of your code’s execution, allowing you to understand the flow of your program and identify any potential issues with ease. This visual approach to programming is particularly beneficial for beginners, as it helps them grasp the underlying logic and troubleshoot their code more effectively.

In addition to its visual programming interface, Thonny boasts a user-friendly interactive code editor. This feature enables you to write, test, and refine your Python scripts within a single, integrated environment. The editor’s clean and intuitive layout, coupled with helpful syntax highlighting and autocomplete functionality, streamlines the coding process and makes it more accessible for novice programmers.

  • Intuitive interactive code editor for writing, testing, and debugging Python scripts
  • Powerful code visualization tools to understand program flow and identify issues
  • Beginner-friendly interface that simplifies the coding process

By leveraging Thonny’s key features, users can embark on their Python programming journey with confidence, building their skills and honing their problem-solving abilities in a supportive and user-friendly environment.

Writing and Running Python Code in Thonny

As an interactive code editor and a powerful Python learning platform, Thonny offers a user-friendly environment for writing and executing your Python scripts. The code editor in Thonny features a range of helpful tools to assist you in crafting clean and efficient code, including syntax highlighting, code completion, and more.

To write your Python code in Thonny, simply click on the “New” button in the top left corner of the window, and you’ll be presented with a clean, distraction-free code editor. Thonny’s intuitive interface makes it easy to organize your code, with features like tabs, line numbers, and a focused workspace that allows you to concentrate on the task at hand.

When you’re ready to run your code, Thonny makes the process straightforward. Simply click the “Run current script” button, and Thonny will execute your script and display the output in the dedicated output window. This allows you to quickly see the results of your code and debug any issues that may arise.

Feature Description
Syntax Highlighting Thonny’s code editor automatically highlights the syntax of your Python code, making it easier to read and understand.
Code Completion As you type, Thonny offers suggestions for completing your code, helping you write more efficient and accurate Python scripts.
Output Window The dedicated output window in Thonny allows you to view the results of your code execution, making it easier to debug and troubleshoot issues.

Whether you’re a beginner or an experienced Python programmer, Thonny’s intuitive code editor and execution tools can help you write and run your Python code with ease, making it the perfect choice for your thonny, interactive code editor, and python learning platform needs.

Unleashing Your Creativity with Thonny

As a beginner exploring the world of Python programming, Thonny is your perfect companion. This user-friendly IDE (Integrated Development Environment) is designed to help you unleash your creative potential and tackle a wide range of beginner-friendly projects with ease.

Thonny’s intuitive interface and powerful features make it an excellent choice for learning and practicing Python. Whether you’re interested in creating simple scripts, building basic applications, or exploring more complex algorithmic challenges, Thonny’s python learning platform has got you covered.

Beginner-Friendly Projects

One of the standout features of Thonny is its ability to guide you through beginner-friendly projects that are both engaging and educational. From creating simple text-based games to building data visualization tools, Thonny’s comprehensive learning resources and step-by-step tutorials will help you navigate your coding journey with confidence.

  • Develop interactive games, such as Tic-Tac-Toe or Hangman, to hone your programming skills.
  • Explore data analysis and visualization by building projects that analyze datasets and present insights through charts and graphs.
  • Experiment with automation scripts that streamline repetitive tasks and boost your productivity.
  • Dive into the world of web development by creating simple websites and web applications using Thonny‘s integrated tools.

As you progress, you’ll find that Thonny‘s powerful debugging and code visualization tools can help you tackle more complex programming challenges, guiding you through the problem-solving process and empowering you to create increasingly sophisticated projects.

Whether you’re a complete beginner or an experienced programmer looking to expand your skill set, Thonny offers a welcoming and supportive environment for exploring the limitless possibilities of Python. Embrace your creativity and let this python learning platform be your guide as you embark on an exciting journey of coding and problem-solving.

Thonny for Educators: Teaching Python Made Easy

As an educator, I’ve always believed that the best tools are those that empower students to learn and grow. That’s why I’m excited to introduce Thonny, an educational coding tool that makes teaching Python programming a breeze. With its user-friendly interface and step-by-step debugging capabilities, Thonny is the perfect platform for introducing Python to students of all ages and skill levels.

One of the standout features of Thonny is its ability to break down complex coding concepts into manageable, bite-sized pieces. The step-by-step debugger, for instance, allows students to visualize the execution of their code, making it easier to understand the logic and flow of their programs. This hands-on approach not only fosters a deeper understanding of Python but also sparks a genuine excitement for coding.

Integrating Thonny into my lesson plans has been a game-changer. I can now create engaging assignments and projects that challenge my students to apply their Python knowledge in practical, real-world scenarios. The clean and intuitive interface of Thonny ensures that my students can focus on the core concepts, rather than getting bogged down by complex software or unfamiliar user interfaces.

Moreover, Thonny’s flexibility as a python learning platform allows me to tailor my lessons to the unique needs and learning styles of my students. Whether I’m working with novice programmers or more experienced coders, Thonny’s tools and features seamlessly adapt to provide the necessary guidance and support.

As an educator, I’m thrilled to have discovered Thonny, an educational coding tool that truly revolutionizes the way I teach thonny. With its user-friendly interface, step-by-step debugging, and versatile features, Thonny has become an indispensable resource in my classroom, helping my students develop a strong foundation in Python programming and unlock their full potential as coders.

Debugging Techniques in Thonny

As a beginner learning Python, having a powerful and user-friendly debugger can make all the difference. Thonny, the step-by-step debugger, is a game-changer when it comes to identifying and resolving issues in your code. With Thonny, the process of debugging becomes an engaging and insightful experience.

One of the standout features of Thonny’s debugging capabilities is its ability to provide a detailed, step-by-step visualization of your code’s execution. As you step through your program, Thonny’s intuitive interface allows you to see exactly what’s happening at each line, making it easy to pinpoint where things might be going wrong. This code visualization feature is particularly helpful for beginners, as it gives you a clear understanding of how your program is running.

But Thonny’s debugging prowess doesn’t stop there. The IDE also offers a range of advanced debugging tools, such as the ability to set breakpoints, inspect variables, and even step into functions to better understand their inner workings. These features empower you to dive deep into your code, identify the root cause of any issues, and implement effective solutions.

Feature Description
Step-by-Step Debugging Thonny’s step-by-step debugger allows you to closely monitor the execution of your code, making it easier to identify and fix any errors or bugs.
Code Visualization Thonny provides a visual representation of the code’s flow, enhancing the debugging process and giving you a clear understanding of how your program is running.
Breakpoint Management You can easily set and manage breakpoints in your code, allowing you to pause execution and inspect variables at specific points in your program.

Whether you’re a complete beginner or an experienced Python programmer, Thonny’s robust debugging tools are sure to streamline your development process and help you write cleaner, more reliable code. So, dive into the world of thonny, step-by-step debugger, and code visualization, and unlock the full potential of your Python projects.

thonny code visualization

Thonny: A Powerful Yet Lightweight IDE

As a beginner-friendly cross-platform Python editor, Thonny stands out for its comprehensive set of features while maintaining a lightweight and efficient design. This makes it an attractive choice for users with limited system resources or those who prefer a streamlined programming environment.

One of Thonny’s key strengths is its cross-platform compatibility, allowing you to use this lightweight IDE on a variety of devices, from Windows and macOS to Linux. This versatility enhances the accessibility and usability of Thonny, making it a versatile tool for both aspiring and experienced Python developers.
Despite its powerful capabilities, Thonny remains a thonny and efficient IDE. This is a crucial aspect for users who value performance and want to avoid the resource-intensive nature of some development environments. Thonny’s streamlined design ensures a smooth and responsive coding experience, even on older or less powerful machines.

Whether you’re a beginner looking to dive into Python programming or an experienced developer in need of a lightweight and versatile IDE, Thonny is a powerful and user-friendly option worth considering. Its combination of feature-rich capabilities and a lightweight, cross-platform design make it an excellent choice for a wide range of Python development needs.

Feature Benefit
Cross-platform compatibility Allows use on Windows, macOS, and Linux devices
Lightweight design Efficient performance on systems with limited resources
Comprehensive feature set Provides a powerful and user-friendly development environment

Extending Thonny with Plugins and Add-Ons

One of the standout features of Thonny is its remarkable flexibility, which is further enhanced by its robust support for plugins and add-ons. As a Python enthusiast, I’ve always been impressed by the ability to customize my development environment to suit my specific needs and preferences. With Thonny, this level of personalization is not only possible but also incredibly straightforward.

The Thonny community has created a diverse array of plugins and add-ons, ranging from code linters and testing frameworks to specialized Python packages and project management utilities. These additional tools and features allow users to extend the core functionality of Thonny, transforming it into a powerhouse that can grow alongside their programming expertise.

Installing these plugins and add-ons is a breeze. Thonny’s intuitive interface makes the process seamless, allowing me to explore and integrate new capabilities with just a few clicks. Whether I’m looking to streamline my workflow, enhance my debugging processes, or explore niche Python libraries, the Thonny ecosystem has something to offer.

One of my personal favorite add-ons is the Code Linter, which helps me maintain a consistently clean and well-structured codebase. By identifying and highlighting potential issues, it has become an invaluable tool in my daily Python coding routine. Another useful plugin is the Project Management add-on, which helps me stay organized and on top of my various development projects.

The beauty of Thonny’s extensibility lies in its ability to adapt to the evolving needs of its users. As my programming skills and project requirements change over time, I can seamlessly integrate new plugins and add-ons, ensuring that my development environment remains optimized and efficient. This level of customization is a true game-changer, empowering me to unlock the full potential of Thonny and streamline my Python coding journey.

Plugin/Add-On Description Usefulness
Code Linter Identifies and highlights potential code issues, promoting clean and well-structured programming practices. Invaluable for maintaining code quality and catching errors early in the development process.
Project Management Provides tools for organizing and managing multiple Python projects, including task tracking and version control integration. Helps me stay organized and on top of my various development initiatives, improving productivity and efficiency.
Testing Framework Integrates popular Python testing libraries, such as unittest and pytest, enabling comprehensive code validation and debugging. Ensures the reliability and stability of my Python applications, giving me confidence in my codebase.

The flexibility and customization options offered by Thonny’s plugin and add-on ecosystem are truly impressive. As I continue to explore and leverage these tools, I’m confident that my Python coding experience will only become more streamlined and enjoyable.

Integrating Thonny with Other Tools

As a versatile Python IDE, Thonny goes beyond its primary functions by seamlessly integrating with a variety of other tools and technologies. One of the key areas of integration is with version control systems, such as Git. Users can easily connect Thonny to their code repositories and collaborate with team members, ensuring their projects are properly versioned and managed.

Thonny also provides robust support for integrating external Python libraries and frameworks. This allows users to expand the functionality of their projects and explore a wider range of programming possibilities. Whether it’s leveraging popular data analysis libraries or tapping into specialized frameworks for web development or machine learning, Thonny makes it easy to incorporate these external resources into your code.

Integration Feature Description
Version Control Systems Seamless integration with Git and other version control systems for code management and collaboration
External Libraries Easy integration of popular Python libraries, such as NumPy, Pandas, and Scikit-Learn
Frameworks Support for incorporating web development frameworks like Flask and Django, as well as machine learning frameworks like TensorFlow and PyTorch

By harnessing these integration capabilities, Thonny users can streamline their development workflows, leverage a wider range of tools and libraries, and push the boundaries of their Python projects. The seamless integration of Thonny with other essential programming tools and resources is a key factor that contributes to its popularity among both beginners and experienced developers.

thonny integration

Thonny’s Community and Resources

As an enthusiastic user of Thonny, the beginner-friendly Python IDE, I’ve come to appreciate the vibrant and supportive community that surrounds this remarkable tool. The official Thonny website is a treasure trove of learning resources, offering a wealth of tutorials, comprehensive documentation, and an active forum where users can connect, share their projects, and contribute to Thonny’s ongoing development.

One of the standout aspects of the Thonny community is its welcoming and inclusive atmosphere. Whether you’re a newcomer to programming or an experienced Pythonista, you’ll find a friendly group of individuals eager to offer guidance, answer questions, and provide valuable insights. The forum, in particular, has become a hub of activity, with users sharing their coding adventures, troubleshooting issues, and collaborating on innovative projects.

Beyond the online community, Thonny also benefits from a dedicated team of developers who are constantly working to improve the tool and address user feedback. This community-driven approach ensures that Thonny continues to evolve and adapt to the needs of its growing user base, making it an increasingly powerful and user-friendly platform for learning and coding in Python.

Whether you’re just starting your learning journey with Python or looking to expand your skills, the Thonny community and its wealth of resources offer an invaluable support system. From step-by-step tutorials to collaborative problem-solving, the Thonny community is a testament to the power of shared knowledge and the joy of learning together.

So, if you’re ready to dive into the world of Python with Thonny, be sure to immerse yourself in the vibrant and supportive Thonny community. Together, we can unlock the full potential of this remarkable IDE and continue to grow as learners and programmers.

Alternatives to Thonny: A Brief Comparison

While Thonny stands out as a top-notch choice for budding programmers, it is not the only Python IDE available. As an aspiring coder, it’s worth exploring other popular options to determine which tool best suits your unique needs and learning style.

One such alternative is PyCharm, a feature-rich IDE known for its robust code analysis and powerful debugging capabilities. Visual Studio Code, another widely-used alternative ide, boasts a sleek interface and extensive plugin ecosystem, making it a versatile choice for developers of all skill levels.

The standard Python IDE, IDLE, also merits consideration. While it may lack some of the advanced features found in other IDEs, IDLE provides a straightforward and accessible environment for beginners to start their Python programming journey.

IDE Strengths Weaknesses
PyCharm Powerful code analysis, robust debugging tools Larger learning curve, resource-intensive
Visual Studio Code Sleek interface, extensive plugin ecosystem May overwhelm beginners with its versatility
IDLE Simple and straightforward for beginners Limited advanced features compared to other IDEs

Ultimately, the choice of Python IDE comes down to your personal preferences, project requirements, and learning style. By exploring these alternative ide options, you can find the perfect tool to kickstart your Thonny programming journey.

Best Practices for Using Thonny Effectively

As a beginner-friendly Python IDE, Thonny offers a wealth of features and tools to help you write, test, and debug your code with ease. To make the most of your Thonny experience, it’s essential to adopt certain best practices that can elevate your productivity and enhance your Python programming journey.

First and foremost, familiarize yourself with Thonny’s user interface and learn about its various features and shortcuts. The clean and intuitive design of Thonny makes it easy to navigate, but taking the time to explore its capabilities can unlock a world of efficiency. From the step-by-step debugger to the integrated code editor, understanding how to leverage these tools can significantly improve your effective use of Thonny.

Additionally, make a habit of utilizing Thonny’s debugging features regularly. The step-by-step debugger is a powerful asset that allows you to closely examine your code’s execution, identify and fix issues, and deepen your understanding of Python programming best practices. By embracing this tool, you can develop a stronger grasp of programming concepts and become a more proficient thonny user.

Beyond the features within Thonny, it’s also important to take advantage of the wealth of learning resources available. Explore the official Thonny documentation, engage with the vibrant community, and seek out tutorials and guides that can further enhance your knowledge and skills. Staying up-to-date with Thonny’s latest updates and community contributions can help you continue to grow as a Python programmer and make the most of this thonny IDE.

thonny best practices

By embracing these best practices, you’ll be well on your way to becoming a confident and efficient Thonny user. So, dive in, explore the tool’s capabilities, and let Thonny guide you through your Python programming journey with confidence and ease.

Conclusion: Embrace the Joy of Learning Python with Thonny

As I reflect on the journey of exploring Thonny, the beginner-friendly Python IDE, I can confidently say that it has been a truly rewarding experience. Thonny’s user-friendly design, educational features, and supportive community make it an exceptional choice for those looking to learn and master the Python programming language.

Through Thonny, I have discovered the joy of coding. Each new project and challenge has become an opportunity to expand my skills and unleash my creativity. The step-by-step debugging tools and the intuitive interface have made the learning process smoother, allowing me to focus on the core concepts of Python without getting bogged down by technical complexities.

As I continue my Python learning journey, I am grateful for the resources and support provided by the Thonny community. The wealth of tutorials, documentation, and online forums have been invaluable in my growth as a programmer. With Thonny as my guide, I feel empowered to tackle even the most complex programming tasks, secure in the knowledge that I have a powerful and user-friendly tool at my disposal.

So, if you’re an aspiring Python programmer, I encourage you to embrace Thonny and let it be your companion on this exciting journey. Unlock the full potential of Python, and let the joy of coding inspire you to reach new heights in your programming endeavors.

FAQ

What is Thonny?

Thonny is a Python IDE (Integrated Development Environment) that is specifically designed for beginner programmers. It offers a user-friendly interface, step-by-step debugging capabilities, and comprehensive learning resources to help you get started with the Python programming language.

What are the key features that make Thonny stand out for beginners?

Thonny’s simple and clean interface, step-by-step debugging tools, and visual code execution representation make it an excellent choice for beginners. These features help you understand the code flow and identify any issues more easily.

How do I get started with Thonny?

Setting up Thonny is straightforward. You can download the IDE from the official Thonny website, and the installation process is quick and easy, regardless of your operating system. Once installed, you can start exploring Thonny’s features and writing your first lines of Python code.

What kind of projects can I create with Thonny?

Thonny’s features make it an excellent choice for exploring a wide range of Python projects, even for beginners. The IDE’s visual debugging and code visualization tools can help you tackle more complex programming challenges, while its extensive learning resources provide guidance and inspiration for your coding endeavors.

How does Thonny benefit educators teaching Python?

Thonny is an exceptional teaching tool for educators. Its user-friendly interface and educational features, such as the step-by-step debugger, make it an excellent choice for introducing Python programming to students of all ages and skill levels. Educators can use Thonny to create engaging lessons and assignments that help their students develop a strong foundation in Python.

Can I customize Thonny with plugins and add-ons?

Yes, Thonny’s flexibility is further enhanced by its support for plugins and add-ons. Users can customize their Thonny experience by installing additional tools and features, ranging from code linters and testing frameworks to specialized Python packages and project management utilities.

How does Thonny compare to other Python IDEs?

While Thonny stands out as a top choice for beginner programmers, there are other popular Python IDEs available, such as PyCharm, Visual Studio Code, and IDLE. Each of these tools has its own strengths and features, catering to different user preferences and programming needs. It’s worth exploring these alternatives to determine which IDE best suits your specific requirements and learning style.

What are some best practices for using Thonny effectively?

To make the most of your Thonny experience, it’s important to familiarize yourself with the IDE’s various features and shortcuts, utilize the step-by-step debugger regularly, and explore the wealth of learning resources available. Additionally, staying up-to-date with Thonny’s latest updates and community contributions can help you maximize your productivity and continue to grow as a Python programmer.

GDB Compiler Online: Code & Debug with Ease

Have you ever thought about how developers work from anywhere in the world? Today, being flexible and efficient is key. The online gdb compiler has changed everything. Now, we can use powerful tools to compile and debug code from anywhere.

This article will look at how online compilers have evolved. We’ll see how they let us debug code online easily and improve our projects.

Introduction to GDB Compilers

GDB, or GNU Debugger, is a key tool for developers. It helps find and fix bugs in languages like C and C++. It has changed from a desktop tool to an online platform, making debugging easier for more people.

Learning about GDB compilers will deepen our understanding of these tools. They include the gdb ide and gdb web compiler, which make debugging easier and more efficient. We’ll look into their main features and see why moving to online is beneficial.

Why Choose an Online GDB Compiler?

online gdb compiler advantages

Choosing an online GDB compiler has many benefits that make coding easier. The interface is simple, making debugging straightforward. This means we can start coding quickly without wasting time on setup.

These tools are also easy to access from anywhere with internet. This means we can work from different places without worrying about compatibility issues. It makes it easy for teams to work together, sharing ideas and code instantly.

Starting projects is fast with an online GDB compiler. We don’t have to download software or worry about updates. This lets us get immediate feedback on our code, making coding more interactive.

Web-based GDB also makes teamwork easier. We can invite team members to join our projects for real-time reviews and solving problems together. This creates a community among developers, sharing knowledge and ideas.

Key Features of a Web-Based GDB

Web-based GDB compilers have key features that make coding better. They help us work more efficiently and improve our workflow.

Remote Access and Convenience

The main perk of web-based GDB is remote access. We can work from anywhere with a good internet connection. This means we can keep moving forward on projects without being stuck at one spot.

This is super useful for teams spread out across different places. With remote GDB, sharing code and getting feedback in real-time is easy. This makes the development process smoother.

Cross-Platform Compatibility

Web-based GDB also supports many operating systems like Windows, macOS, and Linux. So, we don’t run into problems because of system differences. This lets us work with our code easily, no matter the device we’re using.

Using cross-platform tools helps our team work together better. Everyone can access the same tools, making sure we’re all on the same page.

How to Use an Online GDB Compiler

using online gdb

Using an online GDB compiler makes coding and debugging easier. First, we log into the platform by creating an account. Many online GDB editors let us sign in easily with single sign-on.

Once in, we can start a new project quickly. To write our code, we use the integrated editor. It looks like traditional IDEs but has online-specific features like syntax highlighting and error checks.

After writing, running our code is just a click away. Online GDB compilers support many programming languages. This makes them versatile for various projects.

Managing our files and projects is easy. We can save our work, put files in folders, and go back to previous projects without losing anything. The online GDB editor has tools for finding errors in our code. This makes debugging simpler, even for beginners.

In summary, using an online GDB compiler involves logging in, starting and managing projects, writing and running code, and using debugging tools. These features make coding efficient for both new and experienced programmers.

Benefits of Debugging Code Online

Debugging code online has many advantages that make our programming work better. Being able to debug code online helps us find and fix errors quickly. This makes our work more efficient. Let’s look at these benefits to see how online debugging tools help us.

Real-Time Error Detection

Online debugging tools are great at finding errors as we write code. This means we can spot bugs right away. Catching errors early helps us keep our code top-notch. It lets us fix problems immediately, avoiding delays later on.

Collaborative Coding Environment

Working together on online GDB platforms makes teamwork and innovation better. We can all work on the code at the same time. This teamwork speeds up solving problems and shares knowledge, making us all better coders. Using online debugging tools helps us work together more effectively.

Benefit Description
Real-Time Error Detection Identifies bugs immediately, improving coding efficiency.
Collaborative Environment Enables multiple users to work on code together, fostering teamwork.
Enhanced Learning Promotes knowledge sharing among team members, enhancing skills.
Accessibility Allows coding and debugging from any location with internet access.

Online GDB Compiler: A Comprehensive Guide

gdb ide setup guide

In this guide, we’ll learn how to use an online GDB compiler. We’ll start by setting up our online Integrated Development Environment (IDE) and getting familiar with its interface. This makes us ready to learn the basic commands needed for GDB, especially online.

Setting Up Your Online IDE

Creating an account with an online GDB editor is quick. After signing up, we can log in and start using our development environment right away. Here are the steps to set up:

  1. Visit the online GDB editor website.
  2. Click on the registration option and fill out the necessary details.
  3. Verify your email if required.
  4. Log in to your account.
  5. Get to know the UI, focusing on file management, console output, and debugging tools.

Basic Commands and Functionality

Knowing the basic commands in the GDB IDE is key for debugging. Here’s a table with some important commands, what they do, and how they differ online versus traditional setups:

Command Function Online GDB Editor Traditional IDE
run Starts the program. Executed directly in console. Available via run menu.
break Sets a breakpoint at a specified line. Input in console after selecting the file. Graphically set using the interface.
next Steps over to the next line of code. Executed in console while debugging. Used in debugger menu.
print Displays variable values. Output shows directly in the console. Inserts values in variable watch.

Mastering these commands in our online GDB editor boosts our coding and debugging skills. Moving from traditional setups to a web-based GDB can be smooth if we learn its main features. This prepares us for more complex tools later on.

Comparative Analysis of Online Debugging Tools

Choosing the right tools for programming can greatly improve our work. We look at different online debugging tools to see what they offer. This helps us pick the best tools for our projects.

We’ll check out several areas to compare web-based GDB tools:

  • User Interface Design: A clear and easy interface makes coding better.
  • Functionality: Having many features is key to effective debugging tools.
  • Performance Efficiency: Quick and responsive tools are important for real-time debugging.
  • Support Documentation: Good guides and resources help with troubleshooting and learning.

By looking at these factors, we can find the best tools for our needs. This helps us make smart choices to improve our coding.

Tool Name User Interface Functionality Performance Support Documentation
Online GDB 1 Intuitive Rich features Fast Extensive
Online GDB 2 Simple Moderate features Moderate Good
Online GDB 3 Complex Advanced options Very fast Excellent

This table shows us the tools available for comparison. By looking at their features and speed, we can see which ones are best for us.

GDB Web Compiler vs. Traditional IDEs

gdb web compiler comparison with traditional IDEs

Looking at software development, we see a big difference between the gdb web compiler and traditional IDEs. Traditional IDEs are packed with features like advanced debugging tools and support for many programming languages. They give developers a powerful place to work, perfect for those who want full control over their projects.

The gdb web compiler offers a new way to code that’s easy to use and can be accessed from anywhere. It’s great for remote work and team projects because it works on any device with internet. This makes coding and fixing bugs together easier, which helps teams work better and faster.

When we look at both, we see they have their pros and cons. Traditional IDEs are great for big projects because they have lots of features. But, the gdb web compiler is easy to use and doesn’t need extra setup, making it a good choice for today’s fast-paced projects.

Feature GDB Web Compiler Traditional IDE
Accessibility Accessible from any device with internet Requires installation on specific machines
Setup No installation needed Requires configuration and updates
Performance Dependent on internet connectivity Optimized for local machine capabilities
Collaboration Supports real-time coding with others Collaborative tools often limited or require plugins
Feature Depth Basic debugging features available Extensive debugging and analysis tools

Both options have their place in the development world. As projects change, we might need to switch tools to get the best results. Using the right tool can make coding better for everyone.

Utilizing Cloud-Based GDB for Efficient Development

Using a cloud-based GDB brings big benefits to our development work. It makes coding smoother and helps teams work better together. With cloud GDB, we get to enjoy the latest in programming while facing fewer problems.

Advantages of Cloud Solutions

Cloud compilers change how we code for the better. Here are some top benefits:

  • Automatic Updates: No more worrying about updates. Cloud solutions handle them for us.
  • Easy Scaling: Our development space can grow as we do, without spending a lot on new hardware.
  • Reduced Hardware Dependency: We don’t need to worry about our own computers as much, letting us focus on coding.
  • Enhanced Collaboration: Team members can work together from anywhere, making teamwork smoother and faster.

Using cloud compilers makes our work more efficient and productive. This change updates how we code and helps us tackle new challenges better.

Advantage Description Impact on Development
Automatic Updates Constant access to the latest tools and features without manual updates Reduces downtime and improves workflow
Easy Scaling Resources can be upgraded on demand Enhances project adaptability and responsiveness
Reduced Hardware Dependency Minimized reliance on physical machines Decreases overhead costs and maintenance efforts
Enhanced Collaboration Teams can work together from different locations Accelerates problem-solving and shared innovations

Integrating the GDB IDE into Your Workflow

Let’s explore how to make the GDB IDE a key part of our work. Using some handy tips, we can make our coding and debugging better. Here are ways to make the integration smooth.

Tips for Seamless Integration

  • Familiarize yourself with GDB commands: Knowing key GDB commands boosts our debugging skills.
  • Customize your environment: Setting up the GDB IDE to fit our needs makes it more comfortable and productive.
  • Utilize version control: Using tools like Git with the GDB IDE helps us manage changes and work with others easily.
  • Practice troubleshooting: Dealing with common GDB errors prepares us for project challenges.
  • Integrate with other tools: Connecting the GDB IDE with other development tools creates a unified work environment and improves our workflow.

Following these tips will enhance our GDB IDE experience. It will make coding and debugging more efficient.

Security Considerations for Online Coding Platforms

When we use online coding platforms, we face important security issues. Using secure platforms helps protect our projects from threats. It’s key to know the risks of using online GDB compilers to keep our data safe.

Some common risks include:

  • Data breach incidents that can expose our source code and sensitive information.
  • Malware attacks that can infiltrate systems and disrupt workflows.
  • Unsecure transmission of data leading to interception by unauthorized entities.

To boost our online coding security, we should follow these best practices:

  1. Regularly update passwords and use strong, unique combinations.
  2. Implement two-factor authentication on secure gdb platforms whenever possible.
  3. Review and understand the security policies of the online GDB services we use.
  4. Limit sharing of sensitive data unless absolutely necessary and use encrypted communication.

Good platforms take many steps to keep their users safe. They use encryption to protect data and have strict rules for who can see our projects. We need to be careful with how we handle data to keep our coding safe.

Security Measure Description Importance
Data Encryption Transforms data into a secure format for transmission. Protects sensitive information from interception.
Two-Factor Authentication Requires two methods of identity verification. Adds an extra layer of security against unauthorized access.
User Access Controls Defines who can access what within the platform. Prevents unauthorized users from modifying projects.
Regular Security Audits Evaluates the effectiveness of security measures periodically. Ensures ongoing protection against emerging threats.

User Experience: Online GDB Editor Reviews

User experience is key to the success of online GDB editors. By looking at various reviews, we see what users like and what they wish for more of. This helps us find the best options out there.

Users have many opinions on gdb compilers. Many praise their easy access and user-friendly design. Writing and debugging code in the browser without extra steps is a big plus for beginners and hobbyists.

However, some users point out downsides. They say these editors don’t offer as much as traditional IDEs. Sometimes, they slow down with complex tasks, and not all editors support the same languages. These points from reviews help us see which editors are best for ease and reliability.

To wrap up, we made a table with common feelings from different reviews:

Feature Positive Feedback Negative Feedback
Accessibility Easy browser access, no installation needed Dependency on internet connection
User Interface Intuitive design and layout Can be overwhelming for new users
Speed Fast for simple tasks Slower with larger projects
Language Support Wide range of languages available Some editors lack support for niche languages
Community Support Active forums and helpful user bases Responses can be slow for complex issues

Looking closely at what users say about gdb compilers helps us better understand online GDB editors. This knowledge helps developers pick the right tools for their needs and coding style.

Common Issues and Troubleshooting with Remote GDB

Remote GDB can be tricky. Knowing how to handle common issues can make debugging easier. By understanding these problems, we can fix them faster.

Understanding Error Messages

Error messages tell us when something is wrong. Knowing what they mean helps us act fast. Here are some common errors and how to fix them.

Error Message Meaning Troubleshooting Steps
Connection Timed Out The GDB was unable to connect to the target server.
  • Check the server’s accessibility.
  • Verify the correct IP address and port.
Target Process Not Found The specified process is not running on the target machine.
  1. Ensure the application is executing.
  2. Check the process ID.
Segmentation Fault Your code attempted to access memory incorrectly.
  • Review your pointer usage.
  • Utilize additional debugging flags.

Knowing how to solve common GDB issues helps us work better. Writing down our experiences can also help us later.

Conclusion

As we conclude our discussion on GDB tools, it’s evident that online GDB compilers bring big benefits to modern development. These platforms offer more convenience, real-time collaboration, and easy access, making coding better. They help us work more efficiently, whether we’re debugging simple scripts or complex projects.

Using online GDB solutions changes how we develop. They help us spot errors right away, work across different platforms, and collaborate with others. This makes writing code easier and more effective.

Online GDB compilers make debugging simpler and boost our productivity. By using these tools, we improve our coding routine. This leads to better collaboration and a smoother programming process. Let’s use online GDB compilers to drive innovation and efficiency in our future projects.

FAQ

What is an online GDB compiler?

An online GDB compiler is a tool that lets developers write, compile, and debug code online. It doesn’t need to be installed locally. It uses the GNU Debugger (GDB) to help debug different programming languages.

How can we debug code online using a GDB compiler?

To debug code online, we use the online GDB compiler’s features. We set breakpoints, check variable values, and step through the code. This helps us find and fix errors while the program runs.

Is remote GDB secure for handling sensitive code?

Yes, online GDB compilers are secure. They use encrypted connections and strict privacy policies. This keeps our code and projects safe.

Can we use a web-based GDB for team collaborations?

Absolutely! Online GDB platforms support collaborative coding. This lets multiple developers work together on the same code. It improves teamwork and communication.

What are the advantages of using a cloud-based GDB?

Cloud-based GDB has many benefits. It offers automatic updates, can be accessed from any device, and doesn’t rely on local hardware. This lets us focus more on coding and less on setup.

Are there specific commands that differ in an online GDB compared to traditional IDEs?

Yes, some GDB commands are the same, but some might vary by platform. Online GDB IDEs often have features that make coding and debugging easier. This helps us work more efficiently.

How do we handle errors while using a remote GDB?

To handle errors, get to know common error messages the compiler shows. Use the platform’s troubleshooting tips to fix issues effectively.

What should we look for when choosing an online GDB editor?

When picking an online GDB editor, look at the interface, debugging tools, performance, and user feedback. These factors ensure the tool meets our coding and debugging needs.

JavaScript Compiler: Optimize Your Code Efficiently

Have you ever noticed how some web apps run smoothly while others slow down? This is where the javascript compiler comes in. It’s a tool that makes our code run better and faster.

In today’s fast-paced digital world, writing good code is key. We use javascript compilers to make our coding easier and faster. They help our apps work well and run smoothly. Let’s dive into how these tools can change the way we develop websites.

What is a JavaScript Compiler?

A JavaScript compiler is key in turning JavaScript code into machine code that computers run directly. It does more than just translate code. It also makes the code run faster.

It’s important for developers to know the difference between a compiler and an interpreter. A compiler changes the whole code before running it, making it run faster. An interpreter reads the code line by line as it runs, which is slower.

Keeping JavaScript code updated is crucial for better performance. Just like keeping tech gear in good shape, updating our code helps us work more efficiently. For tips on improving your tech, check out this resource.

Importance of Code Optimization in JavaScript

code optimization in JavaScript

Code optimization is key to making JavaScript run better. By focusing on efficient coding, we can cut down on how long it takes to run and use fewer resources. This means websites load faster, making users happier.

On the other hand, code that’s not optimized can cause problems. For example, it might make users leave our sites because it takes too long to load. It could also slow down how fast servers respond, making things harder to use.

It’s important to use optimization techniques to make our websites run smoothly. Doing so helps keep users happy and makes it easier to add new features later on.

Impact of Code Optimization Benefits
Faster Execution Time Improved user satisfaction
Reduced Resource Consumption Lower operational costs
Enhanced User Experience Increased retention rates
Simplified Future Maintenance Easier updates and feature additions

How JavaScript Compilers Work

Learning about how javascript compilers work is key to making our code better. The compilation process changes high-level JavaScript into low-level machine code. This makes apps run faster.

First, the compiler breaks the code into tokens during lexical analysis. It finds important parts like keywords and variables. Then, parsing puts these tokens together into a syntax tree. This tree shows the code’s logical structure.

After that, semantic analysis checks for errors that could stop the code from running right. It makes sure everything follows the rules and matches up correctly. If it’s good, it moves to the optimization phase.

Here, the compiler tries to make the code run faster and use less memory. Finally, the code generation phase turns the optimized code into machine code. This lets the program run smoothly on the target platform. Knowing this process helps us see how javascript compilers make our apps better.

Benefits of Using a JavaScript Compiler

javascript compiler benefits

Using a JavaScript compiler has many advantages that make coding better. One big benefit is faster code execution. This means the code runs smoother in the browser, giving users a better experience.

Another advantage is less bandwidth use. By optimizing code before it goes live, we can make files smaller. This means faster loading times and less strain on resources, especially for mobile users with limited data.

Keeping code easy to maintain is also a plus. Compilers help spot errors early, saving time and improving the final product’s quality.

The table below summarizes these benefits:

Benefits Details
Increased Execution Speed Compiling leads to faster code execution in browsers.
Reduced Bandwidth Consumption Optimized code results in smaller file sizes for quicker loading.
Improved Code Maintainability Early error detection enhances quality and efficiency in development.

Understanding JavaScript Transpilers

In today’s web development, javascript transpilers are key. They make sure our code works on different browsers. These tools change transpilation, turning new JavaScript into older versions. This lets us use the latest features without leaving anyone behind.

Transpilation vs Compilation

It’s important to know the difference between transpilation and compilation. Compilation turns code into machine code that humans can’t read. Transpilation, on the other hand, changes code from one JavaScript version to another. It’s all about making things work together smoothly.

Popular JavaScript Transpilers Available

There are many great javascript transpilers out there. Here are a few you should know:

Transpiler Description Features
Babel The most widely-used transpiler for JavaScript, Babel allows developers to use the latest syntax while ensuring compatibility. Plugin system, real-time code analysis
TypeScript A superset of JavaScript that adds static types. It offers transpilation along with additional features. Type-checking, rich IDE support
Traceur A Google-sponsored transpiler focused on implementing ECMAScript 6 features in a backward-compatible manner. Modules support, generators

Using javascript transpilers lets us write modern code for everyone. It makes sure our apps work on all browsers. This way, we can reach more people without losing quality.

JS Code Optimization Techniques

js code optimization techniques

In our journey towards making apps run faster, we need to look into different ways to optimize js code. Using these strategies can make our apps run smoother and improve how users feel. Here are some key ways we can make our code better:

  • Asynchronous Programming: Using asynchronous methods stops our scripts from blocking. This lets our code run at the same time, making our apps more responsive.
  • Minimizing DOM Manipulations: Changing the DOM too much can slow things down. We can make fewer changes or use document fragments. This reduces the need for reflows and repaints.
  • Leveraging Built-in Functions: JavaScript has many built-in functions that are made for speed. Using these instead of writing our own can make our code run faster.

When we start using these tips, we can see how they help. In real apps, we often see shorter load times and better performance. Following these guidelines can really improve our coding skills and how well our projects do.

Using JS Minification for Performance

JS minification is key to making web apps run smoother. It makes JavaScript files smaller, which speeds up page loading and boosts user experience. This method removes extra characters like spaces and comments, keeping the code working right.

Advantages of Minification

JS minification has many benefits. Here are some main advantages:

  • Reduced File Sizes: Smaller files mean faster downloads, making pages load quicker.
  • Faster Load Times: Quick loading times keep users happy and engaged, reducing bounce rates.
  • Optimized Code Efficiency: Clean code is easier to maintain and update in the future.

Best Tools for JS Minification

There are many great tools for minifying code, each with special features for different needs. Here’s a look at some popular ones:

Tool Name Main Features Integration Options
UglifyJS Supports ES6+, variable renaming, dead code elimination CLI, Node.js, Gulp, Grunt
Terser Modern JavaScript support, high-speed performance CLI, Webpack, Rollup
Google Closure Compiler Advanced optimization and type checking CLI, Java API, build systems

Using these minification tools in our projects can greatly improve their performance. It makes our development process more efficient.

Implementing JS Bundlers in Your Workflow

js bundlers for workflow integration

Using js bundlers in web development makes managing code easier and boosts efficiency. These tools help us combine JavaScript files into one, making our projects run smoother. It’s key to know how js bundling works to make our development faster and better.

Overview of JS Bundling

JS bundling means putting many JavaScript files into one. This cuts down on server requests, making websites load faster. It also lets us remove unused code, making our projects even more efficient. Adding bundling to our workflow helps us manage resources well and keeps our code tidy.

Top JS Bundlers to Consider

There are many bundling tools out there, each with its own strengths for different projects. Here’s a quick look at some top js bundlers:

Bundler Main Features Common Use Cases
Webpack
  • Highly configurable
  • Code splitting
  • Plugin ecosystem
  • Large applications
  • Advanced configurations
Parcel
  • Zero configuration required
  • Fast build times
  • Hot module replacement
  • Small to medium projects
  • Quick setups
Rollup
  • Ideal for libraries
  • Treeshaking
  • Efficient output size
  • Creating reusable libraries
  • Minimizing bundle size

JS Build Tools for Enhanced Workflows

In today’s web development, using js build tools is key for staying efficient. These tools automate tasks and make our workflow smoother. Tools like Gulp and Grunt make it easy to automate tasks.

Automated workflows cut down on errors and improve teamwork. They save time on manual tasks, letting developers write better code. Task runners also make tasks like minification and testing run smoothly in the background.

The table below shows some top js build tools to boost our development:

Build Tool Key Features Ideal Use Case
Gulp Code streaming, easy plugin integration, efficient task management Quickly running tasks and creating complex workflows
Grunt Configurable tasks, extensive plugin library, community-driven Setting up large projects with defined task sequences
Webpack Module bundling, hot module replacement, code splitting Single-page applications with dynamic features
Parcel No configuration needed, fast builds, out-of-the-box support Quick prototypes and small projects

Using these js build tools helps us work more efficiently and build stronger apps. Adopting automated workflows is key to better quality and faster projects.

Exploring JS Module Bundlers

In today’s world of JavaScript, module bundlers are key to making things simpler. They help developers by combining many JavaScript files and their needed parts into one or a few files. This makes loading times faster and keeps the code organized.

What are Module Bundlers?

Module bundlers are tools that package JavaScript code into bundles. This is crucial for apps that use lots of JavaScript modules. They change the code to fix dependencies and make bundles that are easy for browsers to read. Thanks to bundlers, JavaScript apps run smoother and are easier to use.

Choosing the Right Module Bundler

Choosing the right js module bundler is important. Each bundler has special features for different projects. Here’s a look at three popular ones:

Bundler Main Features Best For
Webpack Code splitting, tree shaking, comprehensive plugin system Complex applications needing extensive configurations
Rollup ES module support, optimization of smaller bundles Libraries and applications aiming for performance
Browserify Simple module management with CommonJS support Smaller projects or those transitioning to ES6

By looking at these bundlers, we can pick the best one for our project’s size and needs. Knowing what each bundler offers helps us use their strengths well. This boosts our work in the JavaScript world.

JS Source Code Transformation Explained

JS source code transformation is key to managing code efficiently. It makes our JavaScript code run better and work on different systems. By using code generation and transpilation, we make our apps more flexible and reliable.

Many developers use tools like Babel to change their JavaScript code. This tool helps turn modern JavaScript into a version that works in older browsers. This way, we keep our code up-to-date without losing features.

Let’s look at the benefits of js source code transformation:

  • Improved performance through optimized output.
  • Increased compatibility with different platforms and browsers.
  • Enhanced maintainability of code by utilizing modern JavaScript features.

Using js source code transformation helps us make apps ready for production. It keeps us up-to-date with the latest web development standards.

JS Code Obfuscation: What You Need to Know

JS code obfuscation is a key technique for those making JavaScript apps. It boosts security and keeps our work safe. By making code hard to read, we keep it away from unauthorized eyes.

There are many reasons to use js code obfuscation. It stops others from copying our work. It also hides our unique code and keeps data safe.

There are tools like JavaScript Obfuscator, UglifyJS, and Closure Compiler. These tools change the code in different ways. We can pick the best one for our needs.

Using js code obfuscation makes our apps harder to hack. It’s a smart move for keeping our work safe.

Strategies for JS Performance Optimization

To make our JavaScript apps run smoothly, we need to use smart js performance optimization strategies. These strategies help make our apps load faster and work better. This makes users happy and improves their experience.

First, we should use asynchronous loading for scripts. This way, important resources load without slowing down the page. Users can start using the app faster. Also, making images and other files smaller helps use less bandwidth. This is key for keeping our apps fast on all devices.

Code splitting lets us load just what we need at first, then bring in more as needed. This cuts down on how long it takes for the page to load. Developers can also boost js performance optimization by using lazy loading for images and web workers for heavy tasks. This keeps the main part of the app running smoothly.

Testing and checking how fast our apps load is also crucial. Tools like Google Lighthouse show us how fast things load and where we can get better. By looking at these numbers, we can make our optimization strategies even better. Planning and doing things right is key to making our efforts work well and grow.

For more tips on how to do this, check out this resource on implementation and configuration strategies. Knowing these things is important for us to keep making our js performance optimization better.

Strategy Description Benefit
Asynchronous Loading Loads JavaScript without blocking page rendering Improves time to interactive
Image Optimization Compresses images for faster load times Reduces bandwidth usage
Code Splitting Loads only essential code initially Decreases initial load time
Lazy Loading Defers loading images until they are in view Enhances loading speed
Web Workers Runs JavaScript in the background Keeps main thread responsive

JavaScript Compiler: The Future of Coding

The web development world is always changing. The future of coding depends a lot on how JavaScript compilers evolve. As new trends come up, it’s key for developers to keep up to stay ahead.

JavaScript compilers are vital for making code run better and faster. With web apps getting more complex, we’ll need faster and more reliable code. This will push compiler technology forward. How we adapt to these changes will affect our work and the quality of our software.

In the future, we’ll see big changes in JavaScript compilers:

  • Integration with AI: Future compilers might use artificial intelligence for smarter optimizations. This could help developers spot areas to improve in real-time.
  • Cross-Platform Compatibility: We’ll likely see compilers that work well on different platforms. This will make it easier to use code everywhere.
  • Enhanced Debugging Tools: The next set of JavaScript compilers will probably have better tools for finding and fixing problems. This will make development smoother.

Keeping up with compiler evolution will help us use these new trends well. The changing tech world needs us to be proactive. We should be ahead of the curve, not just catching up.

In conclusion, the future of coding will show how well we adapt to compiler changes. Those who embrace these changes will lead in web development innovation.

Trends Potential Impact
AI Integration Improved optimization and real-time feedback
Cross-Platform Compatibility Streamlined code deployment and management
Enhanced Debugging Tools Faster issue resolution and improved code quality

Conclusion

In this review, we looked at how JavaScript compilers help make code better. These tools and methods let developers make their code run faster and more efficiently. They are key to making sure code works well in different places.

We encourage our readers to use these methods in their work. By using compilers and other tools, we can make the most out of JavaScript in our projects. This makes our code run better.

It’s important to keep learning in this fast-changing field. By getting better at coding, we can use JavaScript to its fullest potential. In short, using the strategies and tools we talked about will help us improve our coding skills. This will make our JavaScript projects even better.

FAQ

What is a JavaScript compiler, and how does it differ from a JavaScript interpreter?

A JavaScript compiler changes JavaScript code into machine code before running it. This makes apps run faster. A JavaScript interpreter reads and runs code line by line as it goes. Compilers are faster and more efficient than interpreters.

Why is code optimization important in JavaScript development?

Optimizing JavaScript code makes apps run smoother and faster. It also makes them load quicker, which makes users happy. Good code uses less resources and runs faster, solving common problems that annoy users.

What are the benefits of using a JavaScript transpiler?

JavaScript transpilers, like Babel, let developers use new JavaScript features. They make sure the code works on older systems too. This means you can use the latest JavaScript without losing speed or features in older systems.

How can I improve the performance of my JavaScript code?

To make JavaScript code run faster, use techniques like writing code that runs at the same time. Also, reduce how much the code changes the web page and use built-in functions. These steps make your code run quicker and improve the user experience.

What is JS minification, and how does it benefit my project?

JS minification makes JavaScript files smaller by removing extra characters. This makes the files load faster, which is good for performance. Tools like UglifyJS and Terser make this easy to do.

What are JS bundlers, and why should I use one?

JS bundlers, like Webpack and Parcel, combine many JavaScript files into one. This makes loading times faster and makes managing code easier in big projects. Using a bundler makes building and managing projects more efficient.

How do I choose the right module bundler for my JavaScript project?

When picking a module bundler, think about your project’s size, support from the community, and what features you need. Webpack is great for its flexibility, and Rollup is good for its efficient output.

Can JavaScript source code transformation improve performance?

Yes, changing JavaScript code can make it run better and work on different systems. Tools like Babel help with this. They make sure the code is ready for production.

What is JS code obfuscation, and when should it be used?

JS code obfuscation makes code hard to read to protect it from others. It’s good for keeping your app’s secrets safe. Use it to protect your app’s special code and business secrets.

What strategies can I implement for JS performance optimization?

For better JS performance, work on making your code load faster, use fewer resources, and write it efficiently. These steps improve performance and make apps better for users.

Try Our Fast and Easy Online C Compiler Today

Ever thought about how much faster you could work with a coding tool made for you? Our online C compiler changes the game for C programming. It makes writing, testing, and running code easy and quick. We aim to make fast coding available to all, from newbies to pros, with just a few clicks.

Our tool promises a smooth experience that boosts your coding speed and efficiency. Discover how our online C compiler can make a big difference in your coding life today!

Introduction to Online C Compilers

Online C compilers are key for programmers who want to work with the C language easily. They let users write, compile, and run C code right in their web browsers. This makes coding simpler and more accessible.

Using web-based compilers, we get rid of old problems like complicated setup and system compatibility issues. This opens up coding for everyone, from newbies to experts. It makes learning to code more welcoming for all.

Our online IDEs make coding easier by giving quick access to compilers. This is great for beginners who can try out code and see results fast. With just a few clicks, anyone can start coding, making it fun and less scary.

Benefits of Using Our Online C Compiler

speed in coding

Choosing our online C compiler brings many benefits. It makes coding faster and improves the overall experience. We made our platform for developers at all levels. This way, everyone can be more productive and creative.

Speed and Efficiency in Coding

Our online C compiler is built for speed. It cuts down on waiting times during code compilation and execution. This means you can work on your projects without interruptions.

With our efficient coding solutions, developers can work faster. They can make quick changes and improve their code easily.

Accessibility from Anywhere

Today, convenience is crucial. Our platform lets you code from anywhere with an internet connection. You can work from home, in class, or on the move.

This flexibility opens up new learning chances. It also helps programmers work together more easily.

Features of Our Online C Compiler

Our online C compiler has exciting features for both new and experienced programmers. It offers a user-friendly interface for easy navigation and access to tools. It supports many programming languages, meeting the needs of different coders.

Intuitive User Interface

The user-friendly interface of our compiler makes coding easy. Every part, from editing to output, is clear and easy to use. This helps beginners learn programming and makes complex tasks easier for experts.

Users can find what they need quickly, focusing more on creating new solutions.

Multi-Language Support

Today, programming needs flexibility. Our platform offers multi-language compilers for this reason. Users can compile and run code in various languages.

This lets programmers change languages for different projects. It meets the changing needs of our community and boosts coding skills.

How to Get Started with Our Online C Compiler

registration for online compiler

Starting with our online C compiler is easy. First, you need to register with a simple process. This lets users make an account fast. Then, we guide you through a coding tutorial to make your first C program.

Simple Registration Process

Registering takes only a few minutes. You just need a valid email and a secure password. Once you’re in, you’ll get access to many features that improve your coding.

Creating Your First C Program

After signing up, we help you make your first C program. Our easy steps are great for both new and experienced coders. You’ll learn to write, compile, and run your first program, opening up a world of coding.

Understanding Compilers and their Importance

Compilers are key in programming, turning high-level code into machine language. They are vital because they make coding easier. Developers can focus on making apps without worrying about machine code details. The role of a compiler is to make sure code runs well and as planned on different platforms.

Our online C compiler makes coding smooth and shows how important compilers are. Developers can easily put in their code. Our compiler does the translation, which boosts productivity. Knowing how compilers work helps programmers write better code.

Understanding compilers improves programming skills, making coding more fulfilling. With our online tools, we can make workflows smoother and encourage creativity in programming.

Why Choose Our Online Coding Tools

coding tool comparison

Our online coding tools focus on performance, efficiency, and making users happy. When we compare our tools to others, it’s clear we stand out. We use feedback from users to make our platform better all the time.

Comparative Analysis with Other Tools

Looking at how our compiler compares to others shows why we’re unique:

  • Speed and Performance: Our compiler works fast, giving you quick results. This is key for coding efficiently.
  • User-Friendly Interface: We make things simple, so both new and experienced coders can use our tools easily.
  • Comprehensive Support: Having great support is important for fixing problems. Our team is always here to help.
  • Competitive Pricing: We offer quality features at good prices, making our tools affordable for everyone.

In the world of online coding, our strengths mean we go beyond what users expect. Testing us against others shows we’re the best choice for a dependable online C compiler.

Online C Compiler: Ideal for Beginners and Experts

Our online C compiler is perfect for both new and experienced coders. It offers a lot of help for beginners, making it easy for them to learn programming. At the same time, it has tools for experts to improve their skills and solve tough problems.

Learning Resources and Tutorials

We know that everyone learns differently. That’s why we have a wide range of online C tutorials. Beginners can begin with easy examples and work their way up to harder coding. Experts can dive into complex programming topics.

  • Comprehensive learning paths for new users
  • Hands-on projects to practice coding skills
  • Access to forums for community support
  • Advanced topics for professional development

Integration with Other Programming Tools

programming tool integration

Our online C compiler is great at working with other programming tools. It lets developers use many different resources. We support a variety of code editors and environments, making coding easier for everyone.

Code Editors and Integrated Development Environments

Our online C compiler works well with popular code editors. This makes coding better. It also works with well-known integrated development environments (IDEs), helping both new and experienced programmers.

Here are some key benefits of our programming tool integration:

  • Increased Efficiency: Moving between tools without losing your code makes you work faster.
  • Enhanced Collaboration: Teams can share projects easily across different environments.
  • Flexibility: You can pick your favorite tools without losing functionality.

Performance and Reliability

The performance of online compilers is key to a good user experience. We focus on making our coding platforms reliable. This means users can run their code smoothly without any problems. Our top-notch infrastructure ensures stable code execution with consistent uptime and quick response times.

We test and monitor our platform constantly. This lets users rely on us for seamless performance. Our focus on performance and reliability also improves the user interface. This makes the overall workflow and productivity better.

Choosing reliable coding platforms has many benefits. It means less downtime and coding without any issues. By focusing on these areas, we make a great place for developers at all levels to succeed.

For more on how to integrate systems well, check out this resource. It covers important strategies for implementation and managing configurations.

Security Features of Our Online Compiler

In today’s digital world, online compiler security is crucial for developers. We make sure our users have a safe and dependable place to code. Our platform uses the latest security steps to protect user data and keep code submissions safe. We focus on user data protection to give a secure coding experience.

Data Privacy and User Security

Our online C compiler uses top-notch encryption to keep sensitive info safe. We know trust is key in a secure coding environment. Our platform follows industry rules and laws, making sure users’ data stays private and safe. This focus on user data protection boosts security and helps users code better.

Security Feature Description
Data Encryption Uses advanced algorithms to encrypt user data during transmission and storage.
Compliance Follows global standards and laws for data protection and privacy.
User Authentication Uses multi-factor authentication to check user identity and protect access.
Regular Security Audits Does regular checks to find and fix any security issues.

Real-time Code Execution and Output Display

Our online C compiler changes how we program by offering real-time coding. Users see the results of their code right away. This lets programmers get instant feedback, making learning much better.

Real-time code execution makes debugging easier. Programmers can tweak their code quickly, saving time. Seeing their code work instantly boosts productivity and confidence.

This feature helps with teamwork and learning from others too. Users can share code and get quick feedback, making coding more fun and interactive. It helps both new and skilled programmers.

Feature Benefits
Real-time Code Execution Immediate execution and feedback
Immediate Output Display Visualizes code results instantly
Debugging Support Reduces time spent on correcting errors
Interactive Learning Encourages experimentation and sharing

We focus on real-time coding and quick output to make coding better. This approach helps with learning and doing more work. It gives our users the tools they need to excel in programming.

Community and Support for Our Online IDEs

Programming can be tough and complex. That’s why we’ve built a strong community around our online IDEs. We offer forums and user groups for programmers to talk, share, and get help. This helps with collaborative coding and makes everyone feel part of the programming world.

Forums and User Groups

Our forum lets users connect to solve coding problems, share knowledge, and work on projects together. This is key for growing as a programmer and keeping up with tech news. Our support groups are where mentors help beginners, ensuring everyone keeps learning. Here’s what makes our community special:

  • Knowledge Sharing: Members share tutorials, tips, and resources.
  • Problem Solving: Users work together to fix coding issues.
  • Networking Opportunities: Users meet peers and make professional contacts.
  • Feedback Exchange: Users get helpful feedback on their code.

User support groups are key for open talks and team coding. Joining these groups helps programmers improve and adds to a culture of innovation. Our focus on community makes coding better for everyone.

Feature Description
Active Forums A space for real-time discussions and Q&A.
Regular Meetups Opportunities for online sessions to connect with fellow developers.
Resource Library A collection of both user-generated and curated coding resources.
Expert Panels Q&A sessions featuring experienced industry professionals.

Being part of our forum and groups helps users improve and stay updated. This boosts their coding journey in a big way.

Feedback and Continuous Improvement

We take user feedback very seriously. It helps us make our online compiler better. By listening to what our community says, we can improve the way it works and make it more user-friendly.

How We Incorporate User Suggestions

User suggestions play a big role in how we develop our platform. We talk to our community in many ways to get their thoughts. This helps us make sure our platform meets their needs. Here are some ways we use user feedback:

  • Regular surveys and feedback forms that ask for opinions on the user experience.
  • Online forums where users can talk about features and suggest new ones.
  • Beta testing programs that let users try out new features early.
  • Direct ways for users to report bugs and make suggestions.

What we learn from our users helps us focus on what they really want. We believe working together leads to new ideas. This way, we can make an online compiler that meets a lot of coding needs.

Feedback Source Type of Suggestion Feature Implementation Rate
User Surveys Feature requests 70%
Forums Bug Reports 90%
Beta Testing User experience improvements 80%
Direct Communication General feedback 75%

These numbers show how serious we are about listening to our users. By always looking for ways to get better, we make sure our online compiler is a key tool for all coders.

Conclusion

We’ve made a platform for programmers at all levels. It offers speed, easy access, and many powerful tools. Our online C compiler lets users write and test code easily. It’s perfect for beginners and experts alike.

Looking back, our online C compiler makes coding better and helps with professional growth. It encourages continuous learning. We invite everyone to check out our resources and community as they start their programming path.

Our online coding environment changes how we program. We’re thrilled to see how it will help you grow. With our online C compiler, you can reach new heights in your coding skills.

FAQ

What is an online C compiler?

An online C compiler lets users write, compile, and run C code in their web browser. It means you don’t need to set up anything on your computer. Our online C compiler is great for all programmers, no matter their level.

How do we execute code using your online compiler?

To use our online C compiler, just write your code in the editor and hit the “Run” button. The code gets compiled and runs right away, showing the results on the same page.

Is there a cost associated with using your online C compiler?

No, our online C compiler is free for everyone! We want to make coding tools available to all, from newbies to pros.

Can we use the online C compiler for multiple programming languages?

Yes, our compiler supports many programming languages, not just C. This lets users easily switch between languages and helps a wide range of coders.

What security measures are in place for user data?

We keep user data safe with top-notch encryption and follow strict industry standards. Our platform is designed to be a secure place for all users to code.

How can we access help and support while using the online IDE?

We have a full support system with forums and groups for users to share tips, ask questions, and get help with coding challenges.

Is it easy to register for your online C compiler?

Yes! Signing up is quick and simple, taking just a few minutes. Once you’re registered, you get instant access to our powerful coding tools.

How do we incorporate user suggestions for improvements?

We really value what our users think and actively look for ways to improve our online C compiler. By listening to our community, we keep making our platform better for everyone.

Can we learn to code using your platform?

Absolutely, our online C compiler has learning resources and tutorials for both beginners and experts. We aim to help everyone grow their coding skills and confidence.

What are the primary benefits of using an online coding platform?

The main perks include quick access to coding tools, running code in real-time, supporting many languages, and coding from anywhere with internet. This makes it easier to practice and improve your programming skills.

C++ Compiler: Essential Tool for Programmers

Have you ever thought about how our code turns into the apps we use daily? In software development, the C++ compiler is more than just a tool. It’s a key link between what we write and what the computer can do. This tool helps us make powerful apps that work well on many platforms. It’s a must-have in both school and work.

Exploring C++ compilers reveals their important role in making us more efficient and productive in coding. It’s crucial for programmers aiming for excellence to grasp how these compilers work.

Introduction to C++ Compilers

C++ compilers are key in programming languages. They turn high-level code into something machines can read. This is crucial for making sure our apps work well on different devices.

Over time, compilers have changed a lot. They now make code run faster and more efficiently. This shows how programming languages and their tools keep evolving.

Learning about C++ compilers helps us understand software development better. They connect human-readable code with executable programs. This makes making and running high-performance apps easier.

Aspect Importance
Code Translation Transforms high-level programming languages into machine code.
Optimization Enhances performance and efficiency of the final executable.
Debugging Facilitates error detection and improves code quality.
Portability Allows code to run on different platforms with minimal changes.

As we explore C++ compilers more, we’ll see what they can do. We’ll also look at tools that make programming better.

Understanding the C++ Programming Language

The creation of the C++ programming language was a big step in its history. Bjarne Stroustrup made it at Bell Labs in the early 1980s. It was an upgrade to the C language, adding features like object-oriented programming. This change was key in the world of programming, leading to standards like C++11, C++14, C++17, and C++20. Each version added new abilities and features.

History and Evolution of C++

C++ has changed a lot over the years. Looking at its evolution, we see big improvements in how it works and what it can do. The main changes include:

  • 1983: C++ started with basic features like classes and basic inheritance.
  • 1998: The C++98 standard made the language widely accepted.
  • 2003: C++03 made small changes and fixes.
  • 2011: C++11 brought in new features like auto keyword, nullptr, and range-based for loops.
  • 2014: C++14 improved on C++11, focusing on making code more efficient.
  • 2017: C++17 made the standard library better and added new stuff.
  • 2020: C++20 was a big update, adding things like concepts, ranges, and modules.

Key Features of C++

C++ is known for many key features that make programming easier and more efficient. Some of these are:

  1. Encapsulation: This lets you hide data and show only what’s needed, making code safer and easier to manage.
  2. Inheritance: It helps reuse code through class hierarchies, making things more modular.
  3. Polymorphism: This lets you use objects of different classes in the same way, adding flexibility to programming.
  4. Templates: These help with generic programming, letting developers write code that works with different types without losing type safety.

These features have made C++ very popular. It’s used in many areas, from systems programming to game development.

What is a C++ Compiler?

C++ compiler definition

A C++ compiler is a key software tool. It changes C++ source code into machine code or intermediate code. This is crucial for running C++ programs. Knowing about the C++ compiler helps us understand its many features, making software development smoother.

C++ compilers come in various types, each with its own strengths. These types are important for different programming needs. Here are some main compiler types:

  • Single-pass Compilers: These compile the source code in one pass, giving quick feedback on syntax and errors.
  • Multi-pass Compilers: This type goes through the source code several times, doing deeper analysis and optimizations.
  • Just-in-Time (JIT) Compilers: JIT compilers translate code while it’s running, making it faster by optimizing often-used parts.

Choosing the right C++ compiler can greatly improve our projects. It makes them more efficient, scalable, and easier to maintain. The right compiler choice shows how important it is to know about the tools we use in programming today.

Compiler Type Characteristics Use Cases
Single-pass Fast compilation, immediate feedback Small projects, educational settings
Multi-pass Detailed analysis and thorough optimizations Complex applications, high-performance software
Just-in-Time Runtime optimization, improved performance Web applications, interactive software

How C++ Compilers Work

For programmers, knowing how C++ compilers work is key to making efficient and strong applications. The process of turning C++ code into an executable has several important steps. These steps change high-level code into a program we can run. By understanding these steps, we can fix bugs and make our projects run better.

The Compilation Process

The compilation process has many stages that are vital for turning our source code into an executable file. These stages include:

  • Preprocessing: This first phase deals with directives like include files and macro definitions. It gets the source code ready for the next step.
  • Compiling: Next, the compiler changes the preprocessed source code into assembly language. This lets us check for errors in syntax and meaning.
  • Assembling: Then, the assembly code is turned into object code. This is a format that computers can read.
  • Linking: The last step combines object files and fixes any references to libraries or other modules. This makes a complete executable program.

From Source Code to Executable

Turning source code into an executable goes through many compilation stages. Each stage plays a part in the final product. By knowing what these stages do, we can better fix problems and improve our apps during development.

Popular C++ Compilers

GCC, MSVC, Clang compilers for C++ programming

In the world of C++ programming, knowing the different compilers is key. Each compiler has its own special features and uses. Here, we’ll look at three top choices for C++ development.

GCC (GNU Compiler Collection)

The GNU Compiler Collection, or GCC, is a top pick for open-source compilers. It works on many platforms, letting programmers use the same code everywhere. GCC supports many languages, focusing on C++.

Its flexibility and portability make it great for a wide range of projects. Developers love it for its powerful features.

MSVC (Microsoft Visual C++)

Microsoft Visual C++ (MSVC) is made for Windows apps. It has a user-friendly interface and lots of features. Developers use it to make high-quality apps.

It works well with other Microsoft tools, making coding smooth. Its strong performance is why many choose it for Windows apps.

Clang Compiler

Clang is part of the LLVM project and offers a modern way to compile C++. It’s known for being fast and giving clear error messages. This makes coding better.

Clang supports the newest C++ features and helps with making projects run faster. Many developers pick Clang for its speed and efficient code.

Compiler Type Platform Compatibility Key Features
GCC Open-source Cross-platform Portability, flexibility, multi-language support
MSVC Microsoft proprietary Windows Integrated GUI, intuitive tools, Microsoft integration
Clang Open-source Cross-platform Speed, user-friendly diagnostics, performance optimization

C++ Build Tools You Should Know

In the world of C++ development, knowing the right build tools is key. They help us manage projects better and automate builds. Tools like Makefile and CMake are crucial for this.

Makefile Basics

A Makefile helps manage the build process for C++ projects. It tells the compiler how to put the program together. Makefiles are easy to use and offer many benefits, such as:

  • Automation of repetitive tasks
  • Clear organization of project dependencies
  • Efficiency in building parts of a project
  • Simplicity in handling big projects

Building with CMake

CMake is a powerful tool for building projects across different platforms. It makes setting up projects easier. CMake can create makefiles and workspaces, making it work well with many C++ compilers. It offers several benefits, including:

  1. Flexibility in supporting multiple platforms
  2. Efficient configuration for various build settings
  3. Clear project organization through structured directories
  4. Support for out-of-source builds, keeping the source clean

Using tools like Makefile and CMake makes building and managing C++ projects more efficient. These tools let us focus on coding, not build details.

C++ Integrated Development Environments (IDEs)

C++ IDEs

Choosing the right C++ IDE can make a big difference in how much we can get done. There are many integrated development environments out there. We need to look at their features and how easy they are to use to pick the best ones for our projects. Code::Blocks, CLion, and Visual Studio are some of the top choices. They offer different tools for different programming needs. Let’s compare some key points to help us decide:

IDE Platform Key Features User Experience
Code::Blocks Cross-platform Customizable, lightweight, multi-compiler support User-friendly interface, easy setup
CLion Windows, macOS, Linux Smart code completion, integrated version control Intuitive navigation, robust performance
Visual Studio Windows Advanced debugging, rich extension library Powerful, but can be resource-intensive

These IDEs have tools for debugging that help us find and fix errors quickly. With features like breakpoints and variable watches, our work flows better. Each IDE has its own debugging tools that can really change how we work. Good debugging is key to making strong software.

C++ Optimization Techniques

In the world of C++, making your code faster can really help your app run smoother. Learning about compiler optimization and using different optimization levels helps us make our programs better. We can choose from -O0 to -O3 to make our code faster, without spending too much time or memory.

Compiler Optimization Levels

Every C++ compiler has different levels of optimization that change how fast and efficient the code runs. Here’s a quick look at what each level does:

Optimization Level Description Performance Impact
-O0 No optimization; focus on compilation speed. Fastest build time; least optimized output.
-O1 Basic optimizations that do not involve a space/performance tradeoff. Improved performance while maintaining reasonable build times.
-O2 More aggressive optimizations, without considering compile time. Significant performance gains; larger binary size.
-O3 Includes all optimizations from -O2, plus additional optimizations. Maximized performance, but longer compile times.

Picking the right optimization level is key. We need to think about our project’s needs. Sometimes, we might want faster compilation over better performance.

Advanced Optimization Practices

There’s more to optimizing C++ than just picking a level. Advanced optimization techniques help us make our apps run even better. These include:

  • Code profiling to find slow parts.
  • Using special compiler flags for better performance.
  • Refactoring to make code run smoother.

By using these methods, we can make sure our apps perform well. It’s important to analyze performance and use a careful approach to compiler optimization. This way, we can create strong and efficient C++ programs.

Cross-Compilation in C++

cross-compilation in C++ development

Cross-compilation is key in making apps work on different devices. It lets us compile code for one type of machine on another. This is crucial for making software work on various devices.

Developers often work on different architectures like ARM or x86. This ensures their apps work on many devices.

What is Cross-Compilation?

Cross-compilation means making code on one machine run on another. It’s important for developers who need to work on many hardware types. This is especially true when the target system lacks resources or has a different architecture.

Using cross-compilation helps us develop more efficiently. It also reduces problems with compatibility.

Setting Up a Cross-Compiler

To set up a cross-compiler, we need a toolchain. This includes the compiler, linker, and libraries for the target platform. By setting up this toolchain right, we can cross-compile smoothly. Here are the steps to follow:

  1. Select an appropriate cross-compiler for the target architecture.
  2. Download and install the necessary libraries for the target platforms.
  3. Configure the build settings to specify the target architecture and compiler.
  4. Test the cross-compiler with simple code to ensure correct setup.

By following these steps, we can efficiently build software for different platforms. This lets us make our apps work on a wide range of devices.

Debugging Tools for C++ Programmers

Debugging is key for C++ developers. We use various tools to find and fix problems, making sure our code works well and runs fast. GDB is a top tool for this job.

Debugging with GDB

The GNU Debugger (GDB) is a strong tool for C++ debugging. It lets us run programs step by step and check variables. GDB has many features, such as:

  • Setting breakpoints to pause at certain lines.
  • Looking at variables at any time.
  • Stepping through code line by line.

Using these tools helps us debug more efficiently. As we learn more about GDB, we see how important it is to know the commands. For more on advanced topics, like debugging in NLP, check this resource.

Visual Studio Debugger Features

Visual Studio has a built-in debugger that makes debugging easier. It has many features, like:

  • Breakpoints to stop and check the program.
  • Watch windows to see variable changes live.
  • Immediate windows for running commands while debugging.

These tools make debugging in C++ easier and more efficient. Learning to use them well is key to being a better developer. By exploring GDB and Visual Studio, we can improve our coding skills and make better apps.

C++ Build Automation Practices

Automating processes through CI/CD makes software development smoother and more efficient. Continuous integration helps us work better together and speeds up our coding. Automated builds make sure our apps are always tested and ready to go.

Automating Builds with CI/CD

Adding CI/CD to our C++ projects makes our work better. It automates building, testing, and deploying software. Automated builds help us spot problems fast and keep the code ready for release. This makes working together easier for developers, reducing problems with code mixing.

Benefits of Build Automation

Build automation brings big benefits to our projects. It cuts down on manual work, making us more efficient in making software. Here are some main advantages:

  • Reduced manual effort – Automation lets our team focus on important development tasks instead of doing the same tasks over and over.
  • Increased consistencyAutomated builds make sure the same steps are followed every time, cutting down on mistakes.
  • Quicker feedback cycles – Finding problems fast through automated tests means better code quality and quicker updates.

Using CI/CD in our C++ projects boosts efficiency and quality. It helps us make better software consistently. Adopting these methods will take our development to the next level.

Benefits Description
Reduced Manual Effort Minimizes repetitive tasks, enabling a focus on core development.
Increased Consistency Standardizes building processes to reduce errors.
Quicker Feedback Cycles Facilitates immediate feedback, improving overall code quality.

Using the C++ Linker

The C++ linker is key in the linking process. It combines many object files into one executable file. Without it, our code writing and compiling would not be complete. The linker connects symbols, linking references and definitions from different files.

Symbol resolution is a main job of the C++ linker. It finds functions and variables in object files. This makes sure every function call goes to the right place. This is vital for making executable files that work well and don’t have errors.

Linking libraries is another big part of the process. The C++ linker lets us add external libraries to our code. These libraries add extra features our programs need. So, the linker is crucial for making our programs work fully.

Lastly, the C++ linker manages memory space. It decides where each part of our program will go in memory. This makes our programs run better and use resources wisely.

C++ Compiler Errors and Troubleshooting

Compiler errors can really slow us down and cause frustration when we try to run our C++ programs. It’s important to understand these errors to debug and find solutions. Common errors come from syntax mistakes, type mismatches, and linking problems. Knowing these issues helps us fix them more quickly.

Common Compiler Errors and Solutions

Here are some common compiler errors and how to fix them:

Error Type Description Error Solutions
Syntax Errors Incorrect use of language rules, such as missing semicolons or unmatched braces. Carefully review the code for typographical errors. Use an IDE that highlights syntax issues.
Type Mismatches Using incompatible data types, such as assigning a string to an integer variable. Double-check variable types and ensure appropriate conversions are in place.
Linking Errors Failed to resolve references to functions or variables, often due to missing libraries. Verify that all necessary libraries are included and properly linked in the build settings.

Best Practices for Error Prevention

To avoid compiler errors and improve our coding, we should follow best practices:

  • Implement coding standards to keep our projects consistent.
  • Use static analysis tools to find issues early.
  • Test thoroughly to catch and fix errors before compilation.

By using these strategies, we can cut down on compiler errors in our C++ programming. This makes debugging easier and more effective.

The Future of C++ Compilers

The world of C++ compilers is set for big changes as we move towards more efficient and flexible programming. We see several trends in compilation technology that will change the game for C++. Things like better optimization, five times faster build speeds, and support for new C++ standards will be key.

Emerging Trends in Compilation Technology

Looking ahead, combining C++ with AI tools is a big deal. This will make code generation faster and help catch errors more effectively. We also expect compilers to handle complex data types and new programming ways, helping developers use C++ to its fullest.

The aim is to make tools that make coding easier and improve code quality.

Impact of C++ Standards on Compilers

C++ standards are changing how compilers work. Future versions will bring new features that focus on speed and efficient code. By keeping up with these standards, compilers will meet the need for efficient and easy-to-maintain code. This ensures C++ stays important in the world of programming.

Conclusion

Our journey into C++ compilers has shown their key role in programming. We’ve seen how they connect human code to machine-executable programs. They translate C++ code and make it run well on different platforms.

Learning about C++ compilers helps us use the C++ language better. We’ve covered how they work, optimize, and debug code. These insights improve our coding abilities.

The future of C++ looks bright, with ongoing changes in programming and compilers. We can expect new developments that will change how we write, compile, and run C++ code. This will lead to new innovations in our digital world.

FAQ

What is a C++ compiler?

A C++ compiler turns C++ code into machine code or intermediate code. This lets programs run. It’s key in making software by changing high-level language into something computers can run.

What are the different types of C++ compilers available?

There are many C++ compilers like single-pass, multi-pass, and just-in-time compilers. Each type has its own way of working and affects how well code is made and runs.

How does the C++ compilation process work?

Making a C++ program goes through stages: preprocessing, compiling, assembling, and linking. These steps change the source code into a program you can run. Knowing this is key for coding and fixing errors.

What are some popular C++ compilers we can use?

Popular C++ compilers include GCC, MSVC, and Clang. Each has special features for different programming needs and places.

How do we optimize C++ code during the compilation process?

C++ compilers offer levels like -O0, -O1, -O2, and -O3 for optimization. Choosing these levels helps balance how fast and big the code is, based on what the project needs.

What is cross-compilation in C++?

Cross-compilation means making code for a platform different from the compiler’s. It’s used for making apps work on various hardware, making software more flexible.

What tools can assist with C++ build automation?

Tools like Makefile and CMake help automate building C++ projects. They make managing complex builds easier across different environments.

What debugging tools are available for C++ programmers?

GDB and Visual Studio’s integrated debugger are common for C++ debugging. They help find and fix errors in code.

How do we prevent compiler errors in our C++ code?

Following coding standards, using static analysis tools, and testing can prevent compiler errors. Compile-time checks also help catch bugs early.

What are the emerging trends in C++ compiler technologies?

New trends include better optimization, support for new C++ standards, and AI tools for code generation. These changes will change how C++ compilers work in the future.